Creating Statements

Contents
6-7 from the Main Menu
FocalPoint statements give you the ability to clearly communicate to your customer all outstanding invoice, the invoice and due dates of the invoices, and any payment either applied to invoices or still un-applied.
Prior to creating statements, you may wish to perform a couple of other functions first:
1. Apply unapplied Accounts Receivable credits.
2. Create Service Charges if applicable to your store procedures.
Definitions of fields and functions on this screen are divided by sections for organizational purposes.
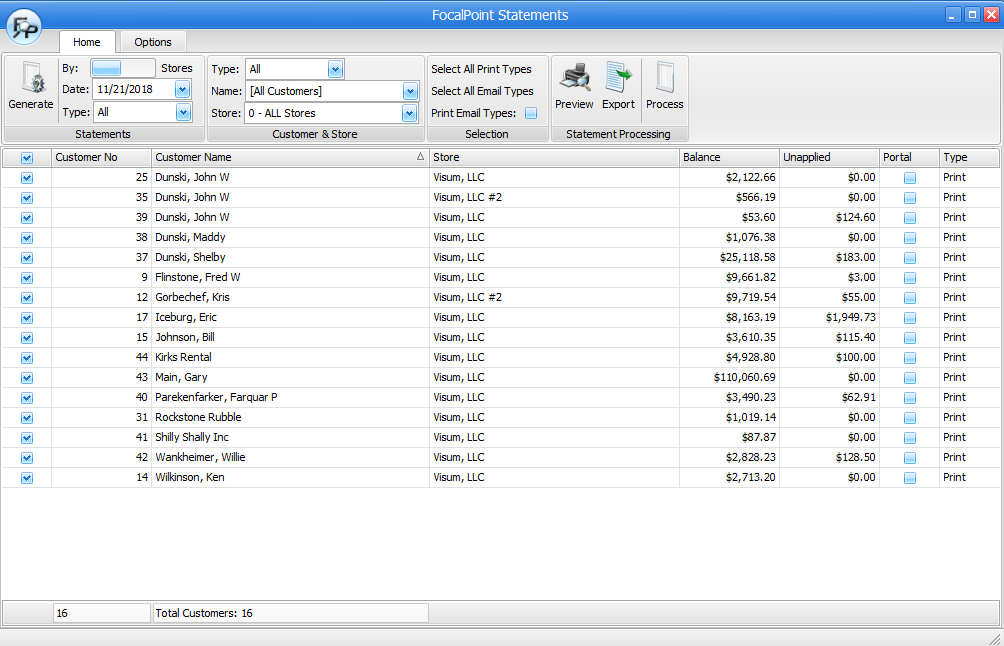
Statements section
By
When you first open the statements function, the screen will be blank. You can run statements by Stores or by Groups (as defined in the Company File). Normally you will run statements by store, which means the "By" toggle should be to the left.
If you have many stores, and need groups of stores to combine statements together, you may use the "grouping" section to accomplish this. Please contact Visum support if you need more information on Statement Grouping.
Date
Select the date that you'd like to run the statements "as of".
Type
You can choose to run all statements, or only those that are designated as print or email, as defined in the customer file.
Customer and Store
Type
You may choose to run statements for all, only cash, or only charge customers.
Name
You may run a statement for any customer or all customers by selecting the appropriate response in this field
Store/Group
If you are running statements by "Store" (most typical), then you can run statements for one store or all stores. If you are running statements by Group, you can run for 1 group or all groups.
Once you've set the Statements and Customer/Store sections appropriately, you can either click on the Generate button to generate statements, or go to the options tab for more settings
The options tab
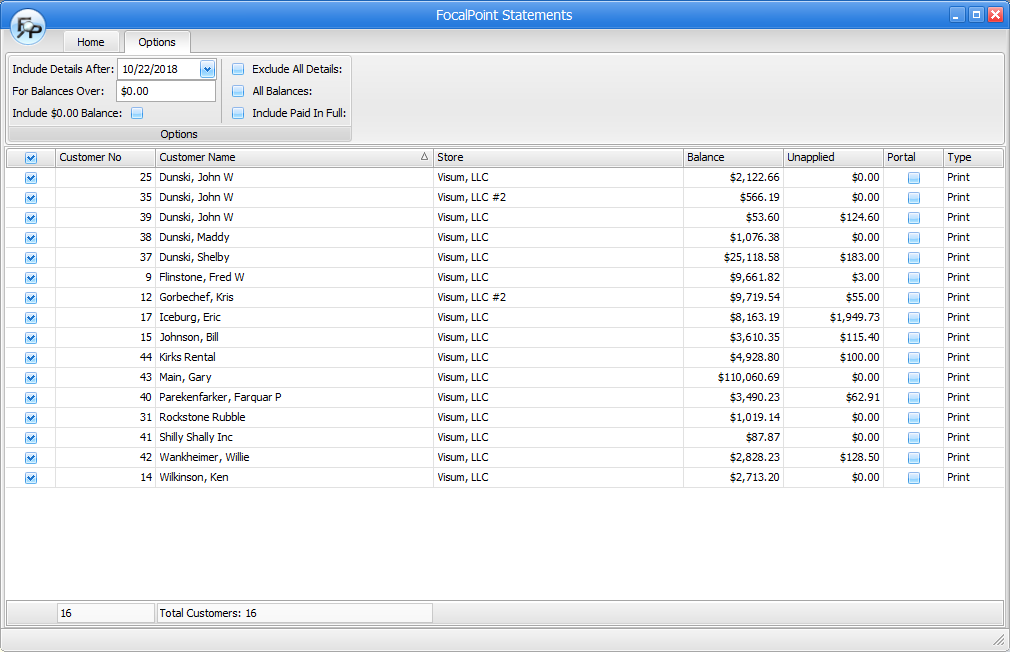
The following settings are available in the options tab
Include Details After
Under each invoice line in a statement, you can choose to show the details (rental, sales, tax, etc) associated with the invoice. By default, these details will show for the most current invoices (invoice <= 30 days old). This can be adjusted as needed.
For Balances Over
You can choose to only include invoices on statements that are over a dollar balance, as entered in this field.
Include $0.00 Balance
Exclude All Details
You may choose to exclude all details if you wish.
All Balances
You may choose to include all balances, positive and negative, if you wish.
Include Paid in Full
If an invoice is paid in full on the day you run the statements for, it will be included if this checkbox is checked.
Back to the Home tab (if you ever left it). If you have not clicked the Generate button yet, please do so to proceed.
Once you've generated statements, you have more options.
In the "Selection" section
Select All Print Types
Click ff you only want to process statements for customers that receive printed statements (as specified in the customer file).
Select All Email Types
Click ff you only want to process statements for customers that receive email statements (as specified in the customer file).
Print Email Types
Click ff you only want to also print a statement for customers that receive email statements (as specified in the customer file).
In the Statement Processing section
Preview
Click to preview any selected statements in the list screen
Export
Click tot exports statement data in an Excel format for any selected statements on the list screen.
Process
Click to process statements. Any statements on the list screen will print or email based on your previous selections.
In the list screen section
•The check boxes in the left most column allow you to select (or skip) any customers to process.
•Customer number and name information needs no further explanation. Neither do Balance and Unapplied numbers.
•The store column represents the "belongs to" store as specified in the customer file. To clarify, if you have a customer that belongs to store 1, but has outstanding invoices for stores 1, 2 and 4, the logo for store 1 will print on the statement. If you run statements for "all stores" then all invoices for all stores will show on the statement.
•If you are using FocalPoint's customer portal to allow customers to see their statements and orders online, a checkbox will appear for any customers who have enrolled in the portal.
•The type field is described above.