Shortly before you “go live” with FocalPoint, you will need to decide what to do with outstanding A/R invoices in QuickBooks. Making this decision prior to going live will help streamline the “go live” process, especially for times when a customer sends you a payment on account for an invoice that was created in QuickBooks.
In QuickBooks, your Accounts Receivable account balance was the sum total of all of the invoices in QuickBooks. Now that invoices are tracked in FocalPoint and NOT in Quickbooks, you will set up a new “other asset” account called “Accounts Receivable-FP” per the export guide instructions.
If you choose to transfer outstanding QuickBooks invoices into the Accounts Receivable-FP account and then make payments on account in FocalPoint, do the following for each invoice in QuickBooks:
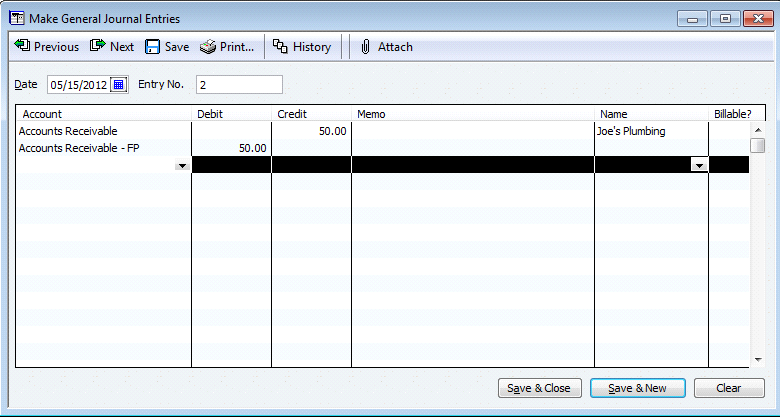
1.Go to Company - Make General Journal Entry
2.On the first line of the Journal Entry, credit Accounts Receivable and put in customer under “Name” column.
3.On the second line, debit Accounts Receivable-FP.

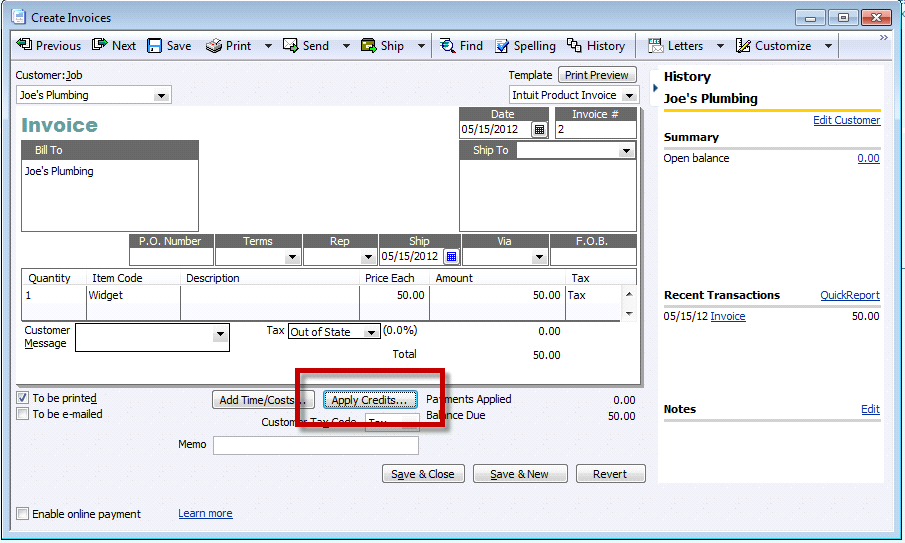
4.Open up the original invoice.
5.Click on “Apply Credits”.

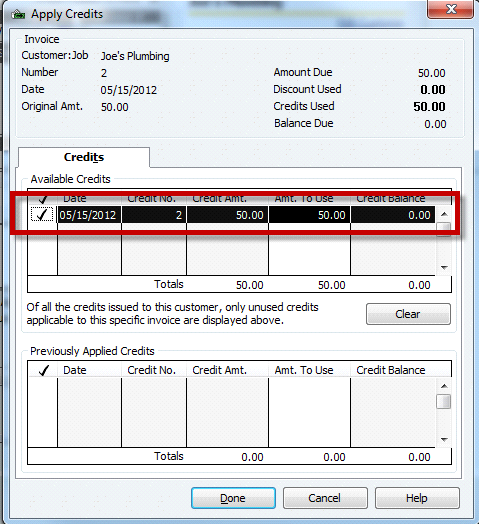
6.Select the appropriate credit on the Apply Credits screen.

7.Save and close the invoice.
8.Repeat for each invoice as needed. You may choose to do all invoices at once, or you may choose to simply transfer them over as needed.
In FocalPoint:
(See Create Invoice Entries and Create Credit Entries)
1.6‐9‐7 from the main menu.
2.Password='visumadmin'.
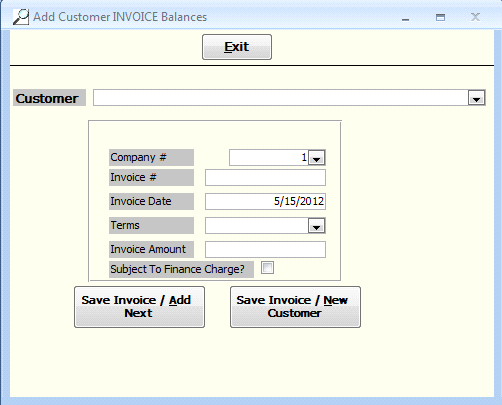
3.Begin typing the customer name or select the customer from the drop down list.
4.For multi-store environments, select the company number associated with the invoice.
5.Enter the invoice number representing the invoice that the customer received. This is a numeric only field.
6.Enter the original invoice date for the invoice. This date will determine aging and finance charge calculations from this point forward.
7.Select the appropriate terms from the drop down list.
8.Enter the amount of the invoice.
9.Subject to Finance Charge-Enable this flag if the invoice should be subject to finance charges. If this invoice IS a finance charge, you may wish to disable this flag.
10.Save Invoice/Add Next-Click this button if you wish to save the invoice and add another invoice for this customer.
11.Save Invoice/New Customer-Click this button if you wish to save the invoice and add an invoice for a different customer.
