The edit existing list screen serves three primary purposes (and several other tertiary purposes):
•There is a company record for each location you have licensed with FocalPoint. You cannot add new locations, but if you purchase additional licenses, Visum will add location for you.
•Company files allow you to control basic information like company location, remit to addresses, order labels, logos, statement company grouping (if multi-store), and store sort order, which allows you to determine in what store order you see other stores inventory.
Video References - We encourage you to watch these videos for training purposes
•Company File - FocalPoint Desktop
There is a company record for each location you have licensed with FocalPoint. You cannot add new locations, but if you purchase additional licenses, Visum will add location for you.
Company files allow you to control basic information like company location, remit to addresses, order labels, logos, statement company grouping (if multi-store), and store sort order, which allows you to determine in what store order you see other stores inventory.
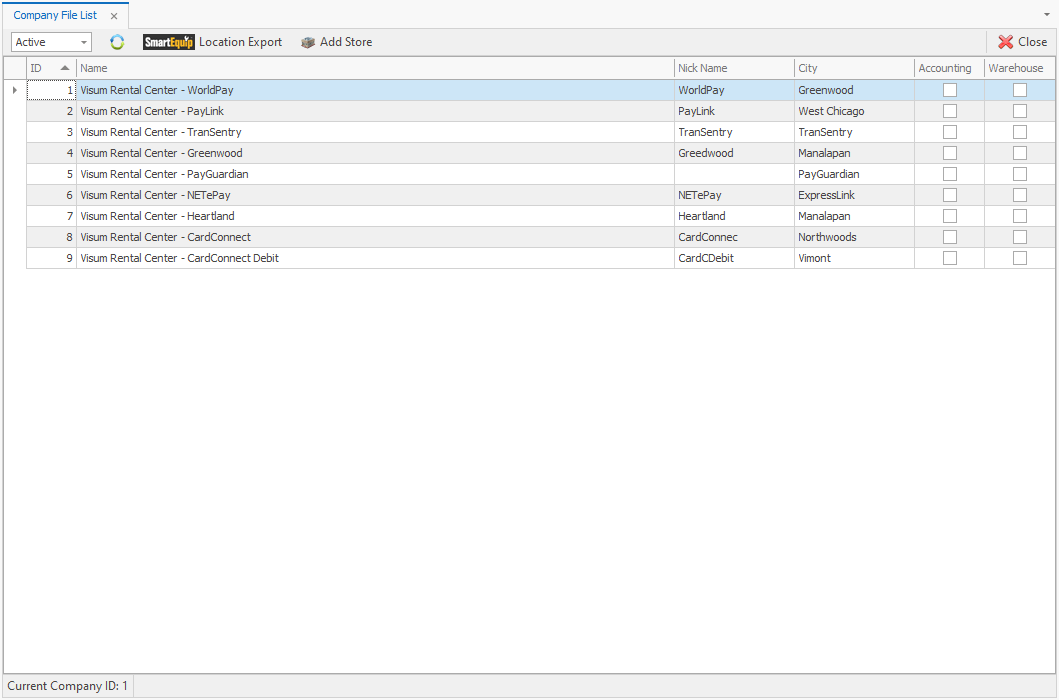
The Company File list screen
When you first go into the company file, you will first be presented with a list of all available companies. You may use the active drop down field to toggle between active and inactive companies. Double click on any company to edit the record.
General tab
The fields on the general tab are broken into sections described below. For more detailed information on setting up a company file record, please view the above video on this subject.
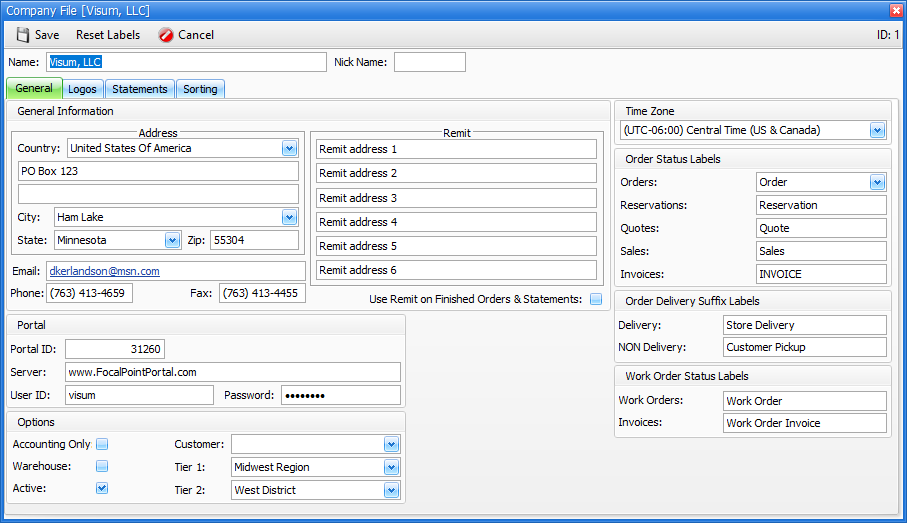
General Information
The general tab is where you need to change the company information to your company information. This information is set to Visum's company information during install, so changing this to your own is imperative. Remit to addresses are optional, and the "Use Remit on Finished Orders and Statements" should be checked if you want the remit to address to be used on orders and statements IN ADDITION TO invoices, where remit to addresses will always be used.
Portal
If you are using Visum's Portal or eCatalog enhanced features, this information will be set up for you
Options
These features will be set up for you during implementation. Worth noting:
•Accounting Only companies are locations set up for accounting purposes only.
•Warehouse locations are set up to be locations where there is no customer traffic but plenty of inventory. The rules for a warehouse location are:
oNo orders can be written from this store.
oAll stores have the ability to write orders / reserve equipment using the warehouse inventory
oThe store that writes the order receives all revenue
oAt return of the order, all warehouse items are placed back into the warehouse automatically.
•Active Company - Normally, the location will be an active company. As such, this field is normally enabled.
Time Zone
Please set your time zone
Order Status Labels
In the upper right corner of front counter documents, the title of the document is controlled with these fields.
Order Delivery Suffix Labels
Use these fields to determine if a second title line (below the "order status label") should print based on whether delivery is selected for an order or not. Any orders that have delivery selected on an order will print whatever is in the second title line in the "Delivery" field. Any order without delivery selected will print whatever is in the second title line in the "NON Delivery" field.
Work order status labels
In the upper right corner of service work order documents, the title of the document is controlled with these fields.
Logos Tab
Logos can be added to FocalPoint to print in the upper left corner of front counter and work order documents. Logos are approximately 6" wide x 1.125" tall. You can design your own using an graphic software, or Visum will be happy to help you put together a logo with whatever graphics you already have available.
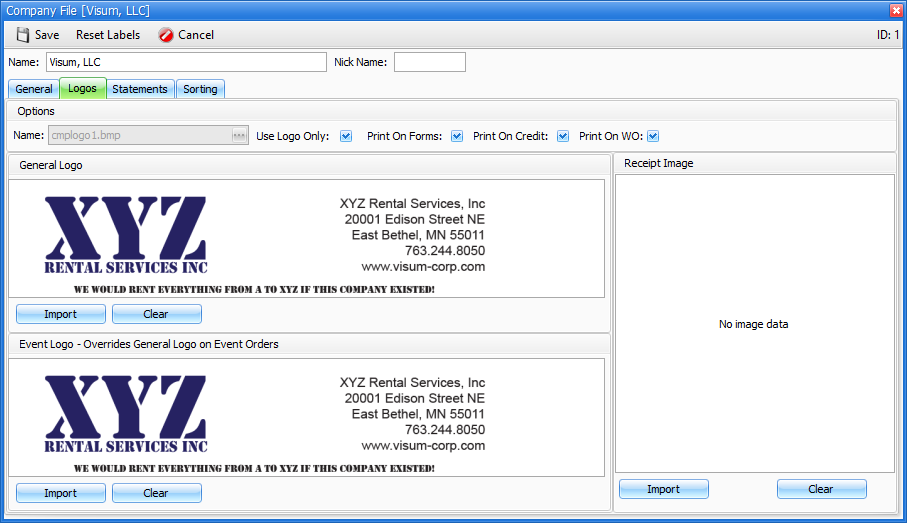
To use this screen:
In the upper left corner of an order (an area roughly 6" long x 1.125" high), FocalPoint can print a logo. In this imaginary 6" x 1.125" rectangle, FocalPoint can print one of two ways:
•Option 1 - FocalPoint can either print the logo in the entire rectangle, or
•Option 2 - FocalPoint can print specific fields from the company file on the left side of this rectangle, and a logo on the right side of this rectangle.
If you want your image to take up the entire 6" x 1" area on your documents (Option 1), click on "Use Logo Only".
If you want your image to print on the right half of the 6" x 1" area on your documents, and have the general information from the General Tab print on the left half (Option 2), then leave "Use Logo Only" unchecked.
The other check boxes are used to allow you to control logo printing "sometimes". For example, if you have your logo pre-printed on paper, and you want to use this pre-printed logo paper for front counter orders, but not credits or work orders, then you would UNCHECK "Print on Forms", and you would CHECK "Print on Credit" and "Print on WO".
Import your images from anywhere into FocalPoint by clicking on the Import buttons. An event logo will be used if an order is flagged as an event order, or if your store manager file identifies you as strictly a "special event store. Finally, if you have a receipt printer that you would like a logo to print on, import it into the "Receipt Image" field.
Statements
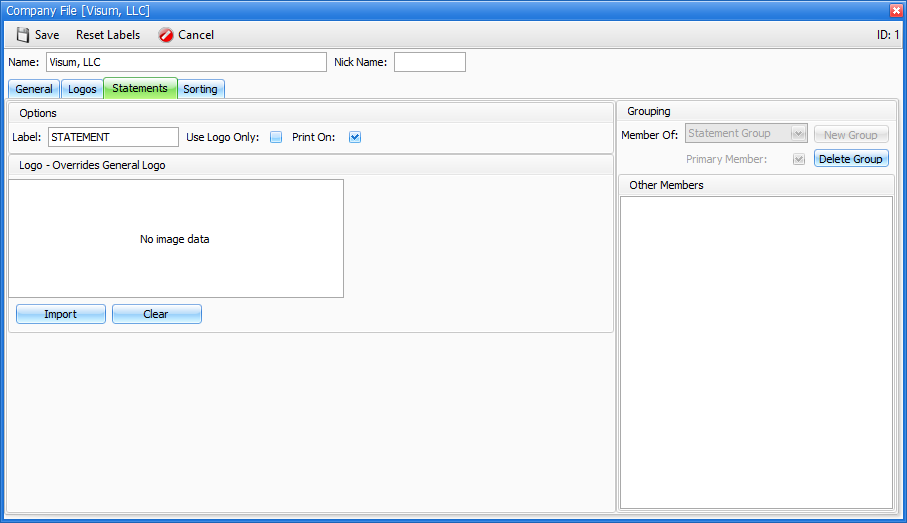
Statements can have their own logo, which may be helpful in multi-store environments where some of your store's statements might need this logo, while others might need that logo. If you have many stores, and need groups of stores to combine statements together, you may use the "grouping" section to accomplish this. Please contact Visum support if you need more information on Statement Grouping.
Follow the same general procedures for logos on this tab as you do for the other logos in the previous section.
Sorting
The sorting order for this location refers to the location order in which inventory should appear on search screens. You can add stores to the locations sorting order by dragging the stores from right-to-left, and remove stores by dragging them from left-to-right.