Inside a Work Order

Contents
E-2 from the main menu
From the work order counter list screen, you can add or edit work orders. This help file will define all of the different functions inside of a work order. The screen you are first presented with when you choose to add or edit a work order will look similar to what is shown below.
There are two primary tabs across the top; Main and Customer. Let's cover these first.
Across the top - the "Main" tab

The top of the main tab is broken into logical sections as are most screens in FocalPoint.
Print section
You can use any of the print/email/save options in this section to save, print, email or preview your work order. You can also print work order labels from this section.
Work Order section
•A pick list can also be printed to show all parts that need to be "picked". Finally, a "Repair Ticket" may be printed, which will show all of the relevant general information about the work order on top of the page, then blank lines for a tech to make notes on.
•The "Finish" options will close the work order, create invoices or warranty entries in the vendor file. Similar to front counter orders, you cannot make changes to work orders once they are "finished". You can re-open them by reverting them, then re-closing ("finishing") them if needed.
•Cancelling a work order will take you out of the work order, and most chagnes you made will not be saved. Cancelling a NEW work order will void it, as will clicking the "Void" button.
•The "Tech Clock" function is covered in a separate chapter.
Across the top - the "Customer" tab

Here you can either click on "Assign" to assign a new or different customer to a work order, or you going to add a new customer to assign to the work order.
Worth noting - Internal work orders, where you are fixing your own items, need no customer assigned to them.
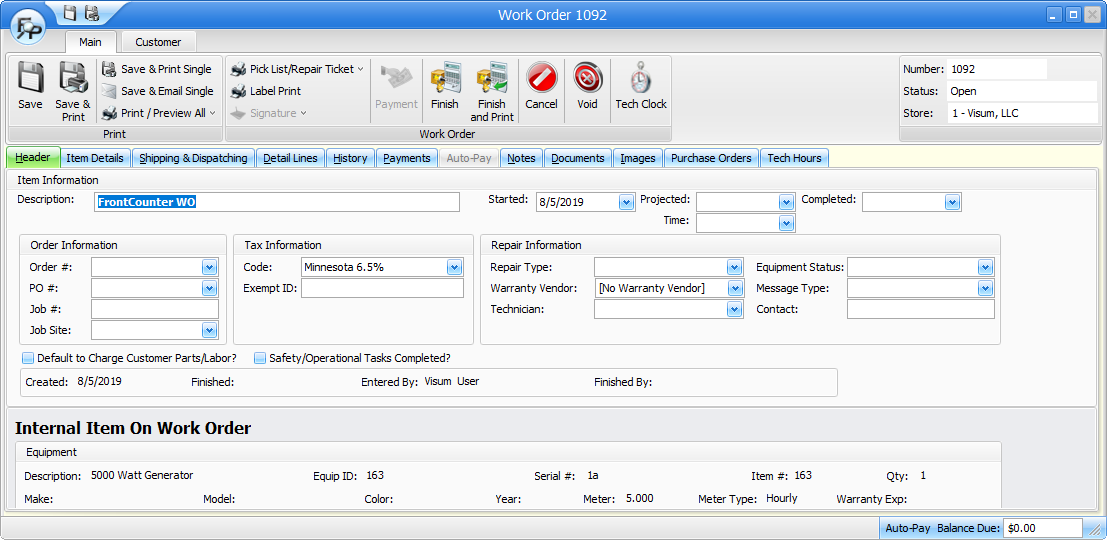
Work Order header
Description and Date Fields
Description - Enter a brief description that will be meaningful when viewing the work order list screen.
Started - This field indicates when the work was started on the work order.
Projected Date and Time - Is this field to indicate when you project the work will be done.
Completed Date - Use this field to indicate that the work has been completed, but the work order is still open and will remain open until the customer has taken possession of the item and paid for the work.
Order Information
Order # - This field is related to the Front Counter Order Number. If this work order was created from the front counter, the order number that it originated from will show in this field. You may add or change the order number as needed.
PO # - Available for customers who wish to reference their PO number to the order. Customers may be set up to require a PO number, and if the customer is set up in this manner, the user will not be able to finish processing the order until this field is populated.
Job # - Available for customers who wish to reference their job number to the order. Customers may be set up to require a job number, and if the customer is set up in this manner, the user will not be able to finish processing the order until this field is populated.
Job Site - If you use internal jobs, select it in this field. This field is used to track jobs internally. For example, if you want to track all activity for a specific jobsite set up and select that jobsite for all customers who will be active at that job-site. An internal job can be added from this screen by double clicking on the field.
Tax Information
Code - If the tax code to be used to calculate tax for this work order is different from the default tax code for the store as defined in the "Store Tax Code" field on the Setup Screen in the Store Manager File, enter the appropriate tax code to be used in this field.
Exempt ID - If this is a customer work order, the customer's tax exempt # (if the customer has one set up in the Customer File) will prefill here. The existence of any characters in this field will make the work order tax exempt. Internal work orders are by default tax exempt.
Repair Information
Repair Type - Use this drop down field to choose a repair type for this work order. Repair types are optional, and can be used to filter out work orders on the work order list screen.
Warranty Vendor - If any warranty work will be done on this work order, use this drop down field to select a vendor.
Technician - If you select a technician for this work order, all labor lines added to this work order will default to this technician.
Equipment Status - Use the equipment status drop-down field to pick a status for the item associated with this work order. You may create as many "statuses" as needed in the Work Order Status file, E-7 from the main menu.
Message Type - You can set up pre-written messages to print on a work order in the work order messages file, E-5 from the main menu. Use this field to select any messages that you have available.
Contact - Use this free form contact field to specify who your contact is related to the customer on this work order.
Other fields
Default to Charge Customer Parts/Labor - Check this checkbox if you wish to have all parts and labor to default to customer charges.
Safety/Operational Tasks Completed? - For your informational purposes, use this checkbox to indicate if these specified tasks have been completed.
Item On Work Order
If an item that is to be serviced has been selected for this work order, it will show in the bottom section of this screen
Item Details
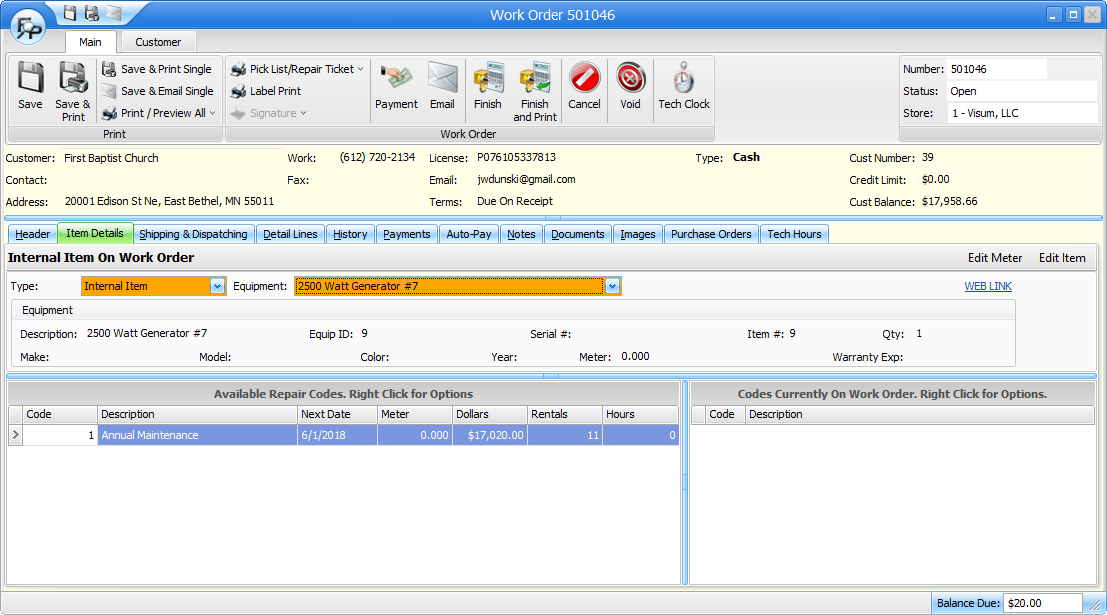
Type - Internal items are your own rental items. Customer items are items that are owned by your customers. You can also select New Customer Item to add a new customer owned item to the database.
Equipment - Click on the drop down to select the item you wish to service.
Edit Meter - Click on this to edit the meter of the item.
Edit Item - Click on this to view/edit the rental (internal) item or the customer owned item.
Available Repair Codes - Any repair codes that are assigned to the item you are servicing will show on the left. Right click on any available repair code to add it to a work order or view the history of the repair code for this item.
Shipping and Dispatching
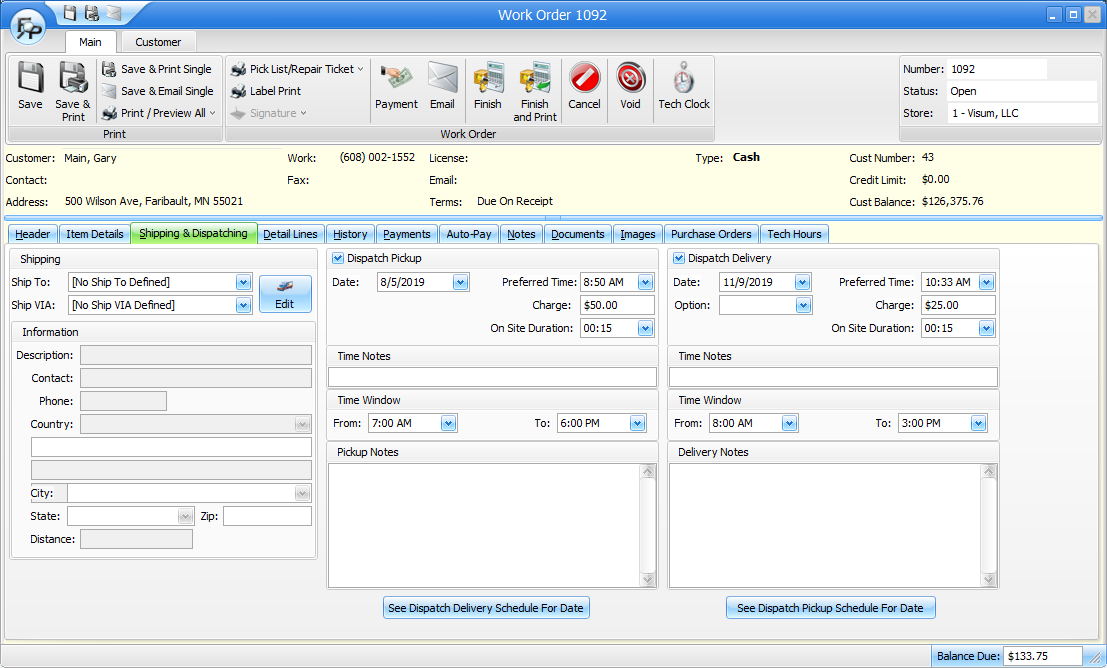
In the shipping and dispatching tab, you can add, edit, or select a ship to, and add or change your delivery and pickup dates and times. You can also see all dispatching information for the delivery or pickup date you’ve chosen.
You can choose any location that you have set up in the location file, 6-9-B from the main menu. Locations can help you pre-fill delivery and pickup notes, and you can also use it for the “revenue by location report”, B-B-E form the main menu.
Use the drop down in the ShipTo field to select from ship-to addresses previously entered, or add a new one. Ship to records remain with the customer until you deactivate them, streamlining future order entry efforts for the customer. When ship to functionality is used, the user then has the ability to generate a map from Google Maps or MapQuest on the Additional Header Fields tab.
The information section below the shipping area will reflect any ship to information you chose.
Use the drop down in the Ship Via table to select or add a shipping method to the order.
To set delivery and pickup dates/times and notes, check the “dispatch delivery” and “dispatch pickup” check boxes. Once you do so, you can choose delivery dates and time windows, delivery charges, and on site durations for dispatching purposes. Delivery options can be set up by going to 6-9-C from the main menu to assist with setting delivery and pickup amounts.
At any time you can see dispatch schedules by clicking either of the buttons at the bottom of the shipping and dispatching screen.
Detail Lines

The detail lines tab is where you can add parts and/labor to your work order. You can also create on-the-fly "Groups" to organize your parts an labor by task
Adding Parts
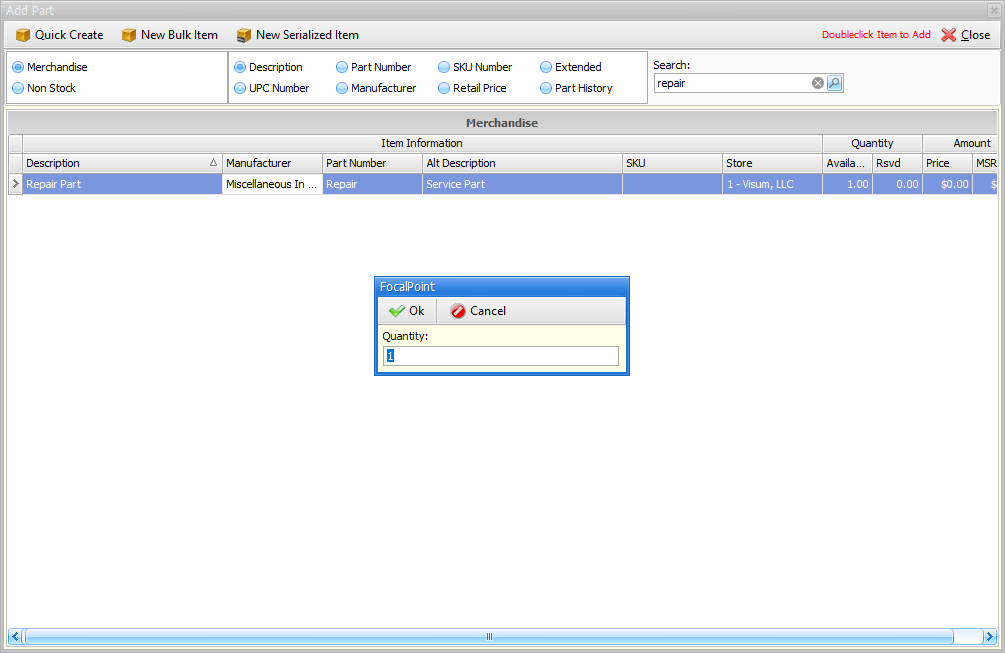
When you click on "Add Part", the merchandise selection screen will appear. From here you can select parts to add to your work order. This screen is near identical to the same function used in order processing. From here you can also create new merchandise items by using either the Quick Create, New Bulk Item or New Serialized Item tab.
Editing parts after addition
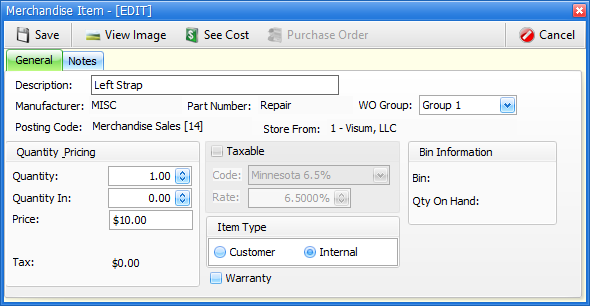
If you double click or right-click-edit a part after it has been added to a work order, the above screen will appear. Like you can in order processing, you may change the description of this item for this work order. The change will only be relevant to the current work order. Across the top, you may also view an image of the item if you loaded one, see the cost, or add this item to a purchase order.
Adding Parts to a Purchase Order
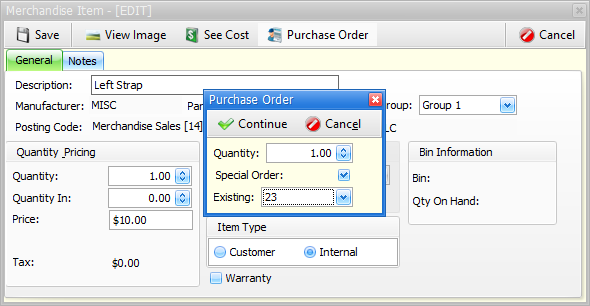
When you click on "purchase order" while editing a part, you may specify the quantity that you are ordering and choose to add the item to an existing purchase order or create a new purchase order (if the merchandise item has a vendor assigned it). If no vendor is assigned, you will be given the opportunity to assign a vendor during this process. Clicking "Special Order" will associate this purchase order line with this work order, and you can then monitor open PO's for this work order in the "Purchase Orders" tab (further down the page).
Adding Labor
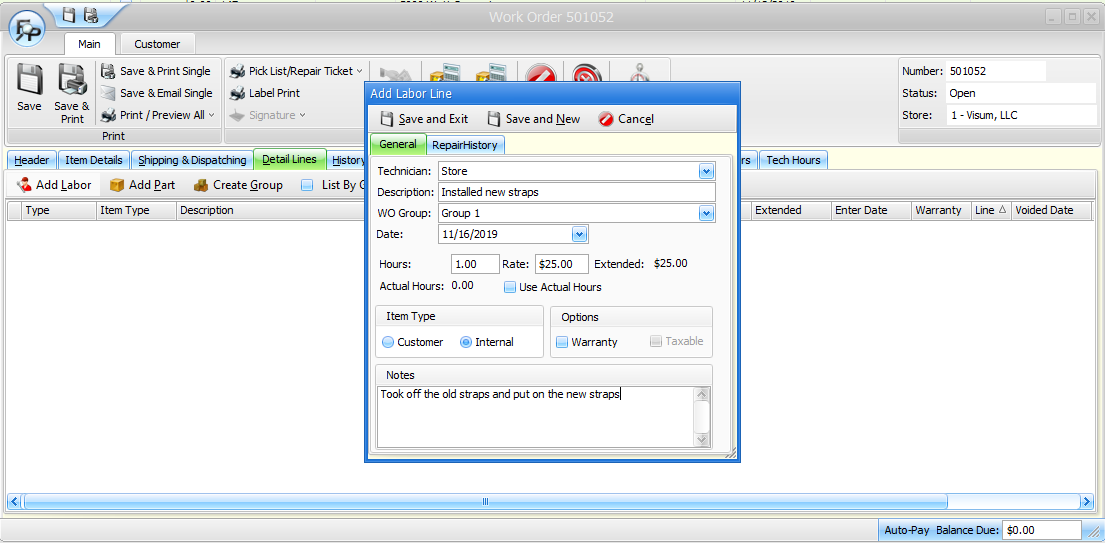
Click on "Add Labor" to add a labor line to the work order. Choose a technician, and modify the description to describe what labor is being performed (best practice). The "Hours" and "Rate" fields allow you to specify how much labor this task will incur. Or, you can use "Actual Hours" by using the Tech Clock feature.
Editing Labor after addition
When you double click on a labor line after it has been added to a work order, the same screen that you see when add labor is shown. You may edit information on the labor line as needed.
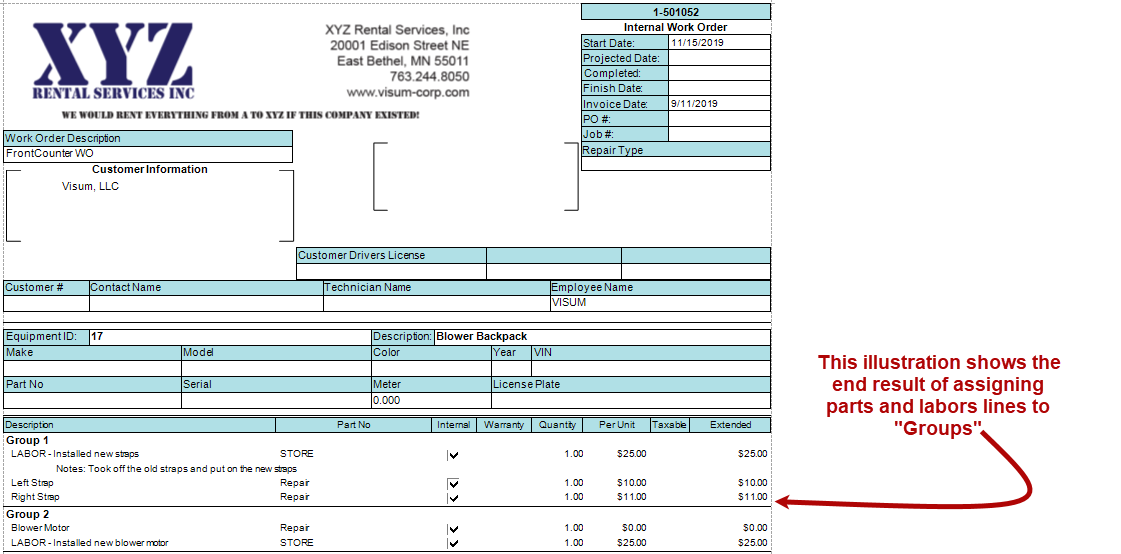
Creating Groups
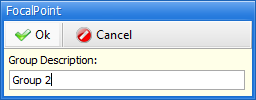
Groups are free form, and specific to a work order. Use them to organize your parts and labor into logical groupings. In the example below, you will see that we divide parts and labor into "Group 1" and "Group 2". The group names are self defined, and would normally be short definitions of the work being performed. For example, "New Shoulder Straps" and "Blower Motor" would have been appropriate group names for the work order below.
Showing Voided Lines
History
The history tab is where you can find all service history about the item your servicing. Use the Open, Finished and Voided buttons to control which type of work orders you are viewing. The "By Serial Number" option allows you to see all service history for the serial number of the item, regardless of which customer owned it, for occasions where the same item might change ownership several times, and your store has been maintaining the item for several different customers.
Preventative maintenance history, Inspection sheets and work order credits may also be viewed from this tab.
Payments
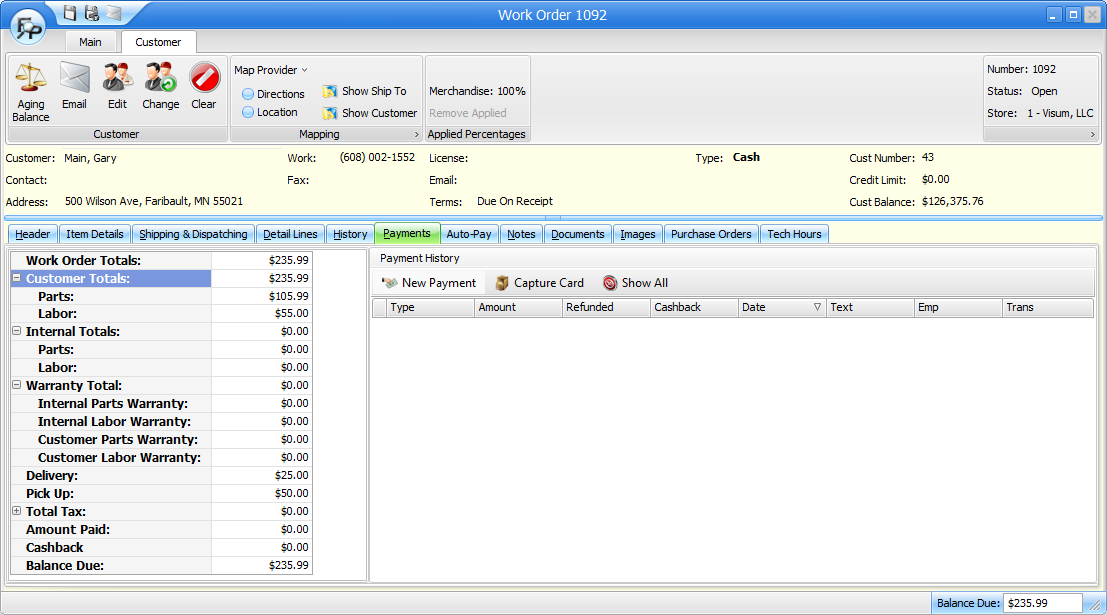
On the left side of the screen in the totals tab, you can see where the work order currently stands with respect to charges and payments received. The payment history section shows payments already made to this order. If you right click on a payment or use the buttons above a payment, you can capture credit card information, or refund, reverse or void a payment.
To take a new payment, go to the new payment tab. Select any payment type icons on top, and enter the amount received in the “To Process” area. The options you have available below the payment types will vary based on the payment type you select.
Auto Pay
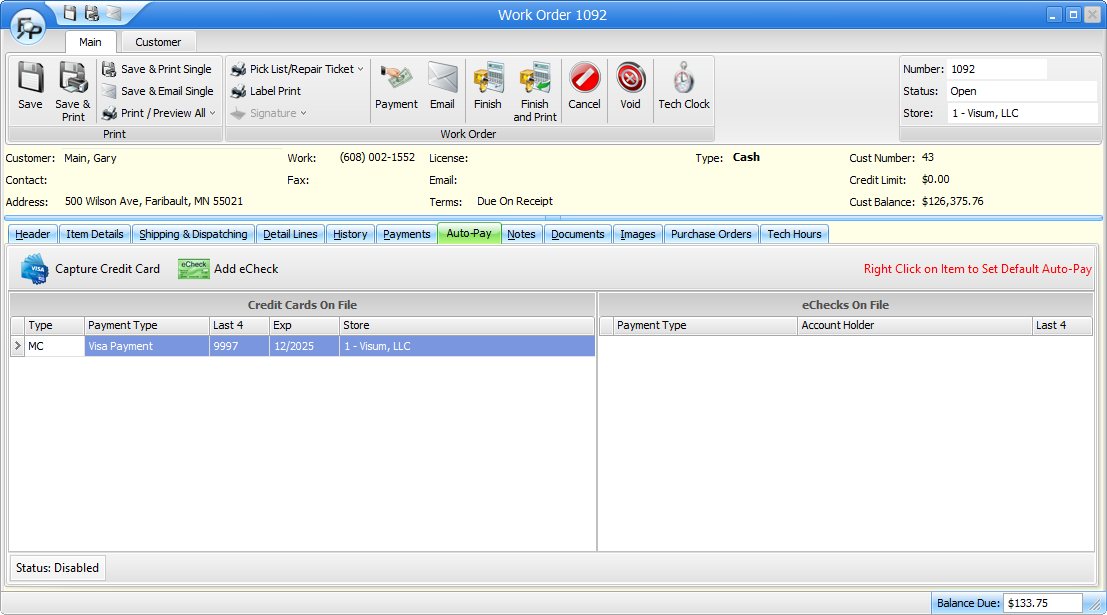
If you use integrated credit card processing, you can select a stored credit card token for "Auto Pay" on a work order. By doing so, any balance due by a customer on this work order when finishing will automatically be charged to the AutoPay credit card. To assign a credit card or eCheck on file to be use for Auto Pay, simply right click on the payment and choose "Set Auto Pay"
Notes

Print Notes: The Notes In is automatically populated with any discount information that is related to the customer. This is also where descriptions of why the item is needing service would be entered. The repair notes are typically used to describe/summarize the service that was performed. The notes are free form, so you can really use them for whatever you wish.
Internal Notes: These are also free-form notes, but they will not print anywhere. They are for internal purposes only.
Documents
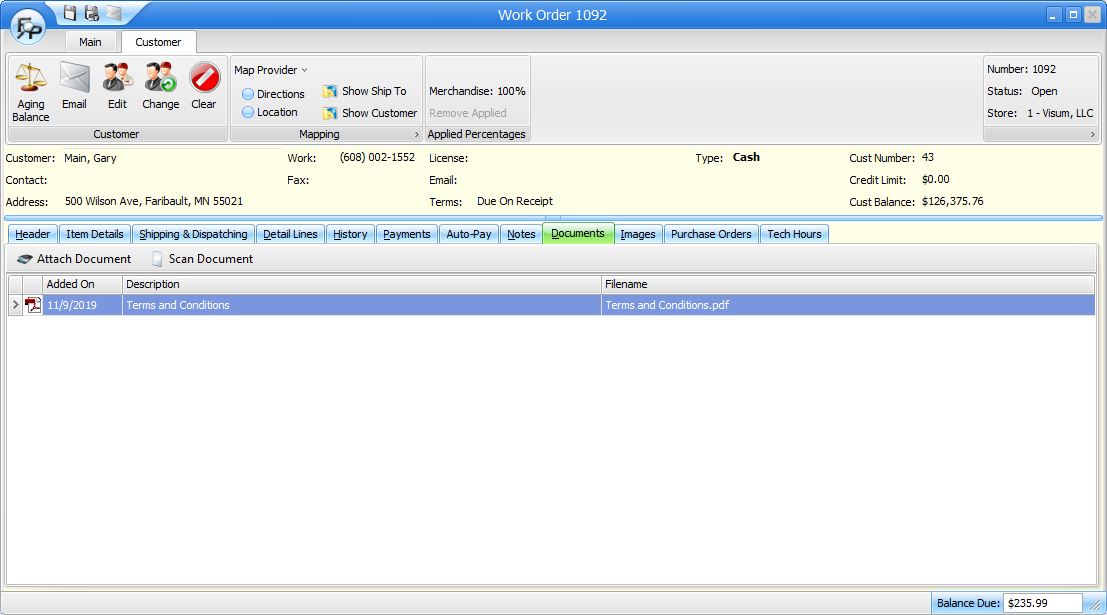
In the documents tab, you can attach many different types of documents. If there is a scanner attached to your PC, you can scan right from FocalPoint and attach the scanned document directly to the order. When you Attach or Scan a document from your PC, FocalPoint will copy the document to the server so that all FocalPoint workstations can access the document after it has been added. You may also double click on the attached document to view it.
Images
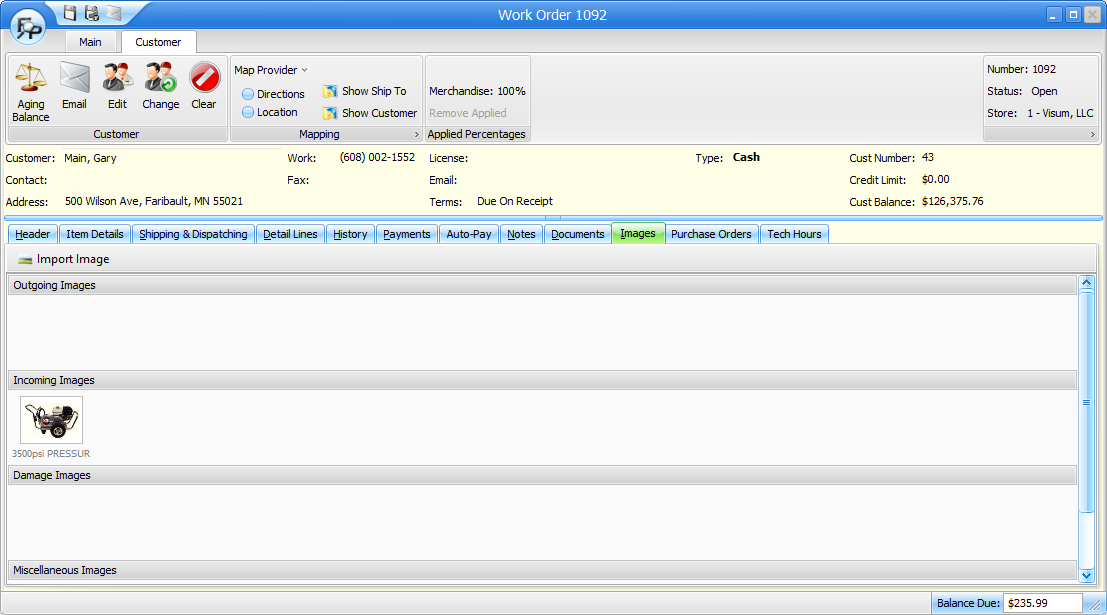
On the images tab, you can import images from any digital camera that can be plugged into your PC and import images into the outgoing, incoming, damage or misc image folders.
Purchase Orders
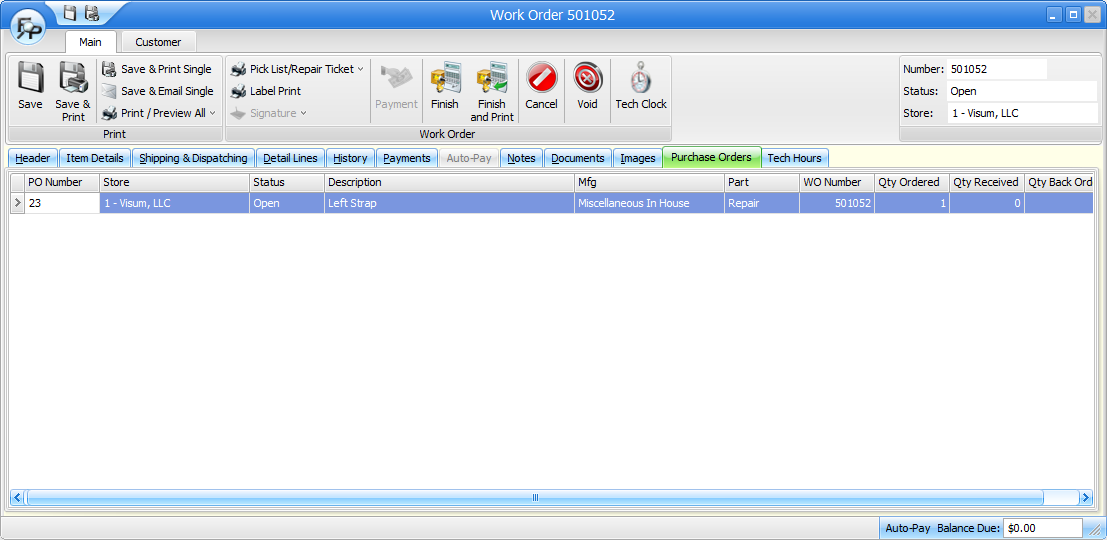
Use this tab to see a list of purchase orders that were created from this order. If you double click or right-click-open on the purchase order line, the purchase order will open.
Tech Hours
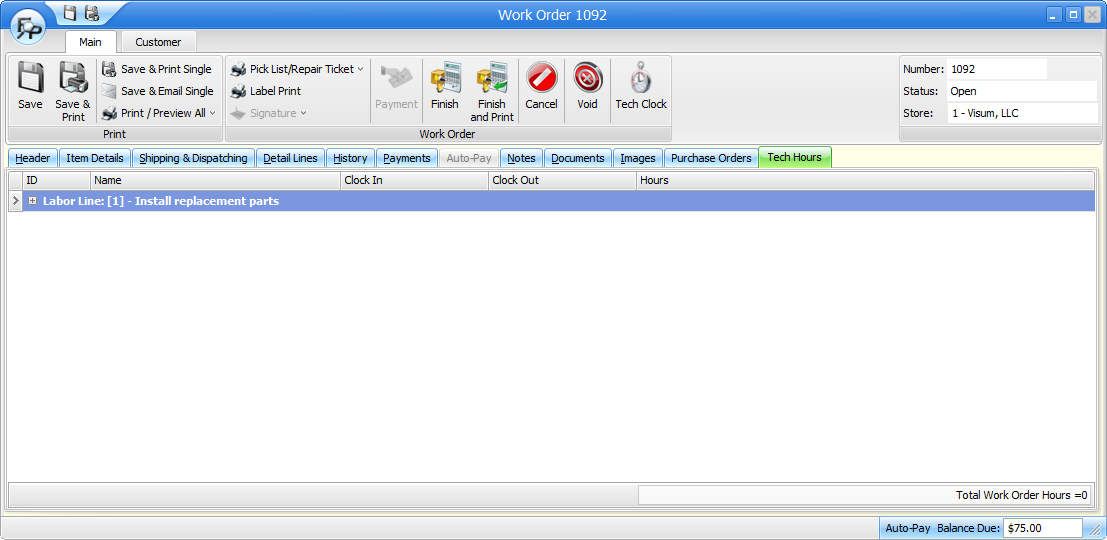
The tech hours tab will show you all of the labor lines. Click on the "+" plus sign to see the amount of time that each tech spent on the labor line. More about this can be learned in the Tech Clock help file chapter.