Transfer File List

Contents
2-4 from the Main Menu
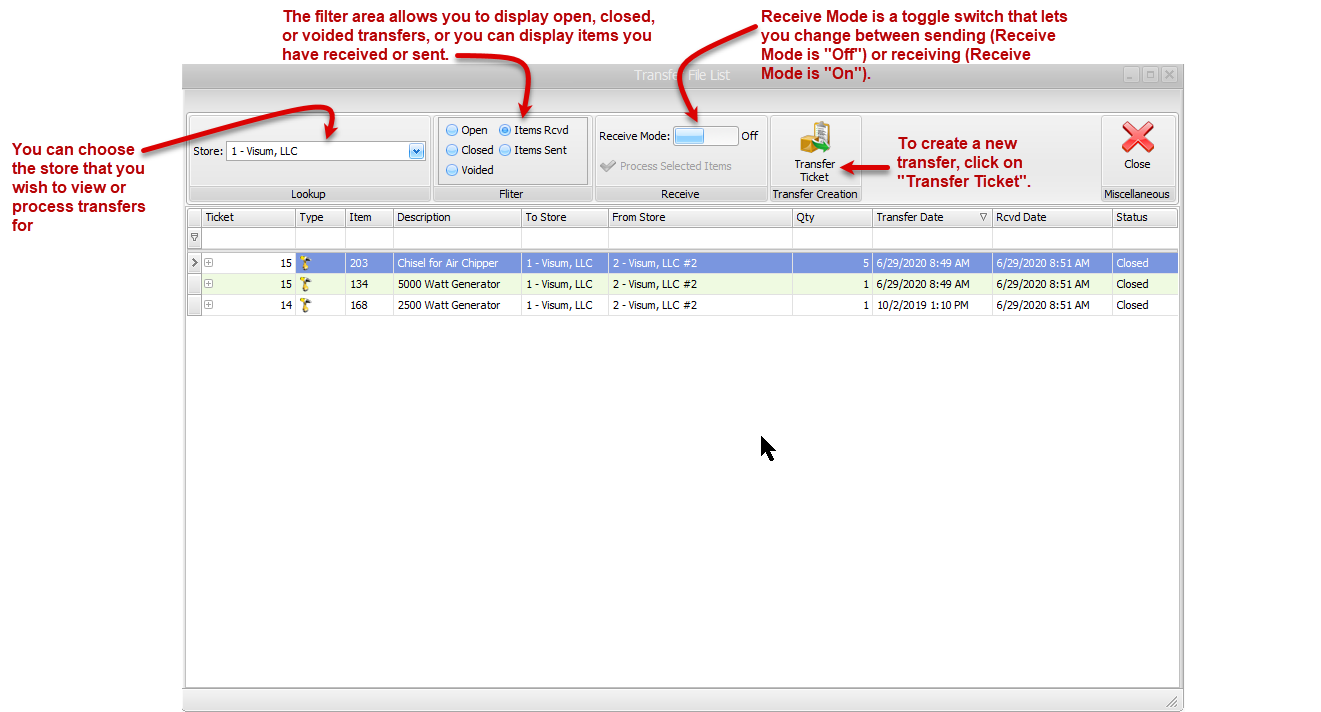
The transfer file list is where you can initiate and receive merchandise and rental transfers between stores. You can also see a list of previous transfers, which will be the first screen you see when you open this function.
Across the top of the screen you can choose the store that you wish to view or process transfers for. The filter area allows you to display open, closed, or voided transfers, or you can display items you have received or sent.
Receive Mode is a toggle switch that lets you change between sending (Receive Mode is "Off") or receiving (Receive Mode is "On").
Finally, to create a new transfer, click on "Transfer Ticket".
To initiate a transfer to another store
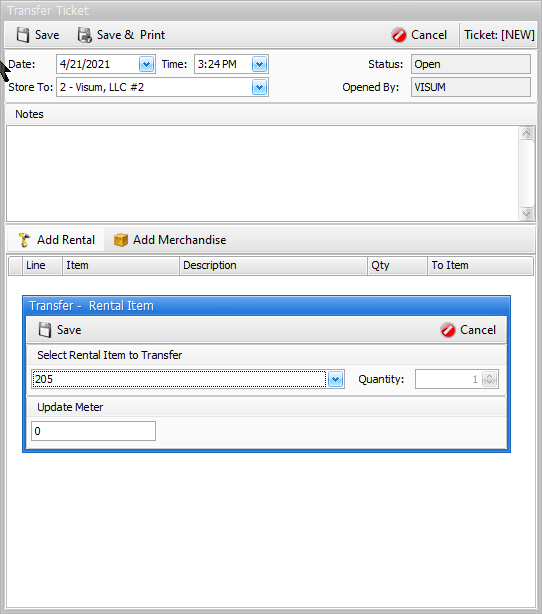
Click on the "Transfer Ticket" button. A screen will appear where you can choose the store that you are transferring rental or merchandise items to.
If you click on "Add Rental", you can search for the item you wish to transfer, enter a quantity (if not serialized) and update the meter reading before the item leaves if applicable
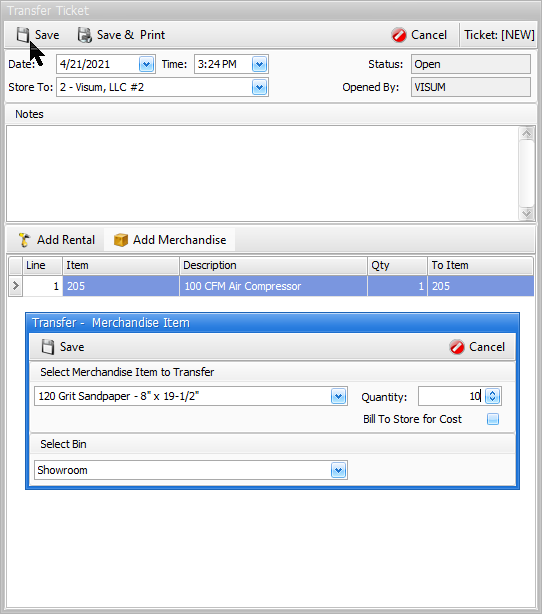
If you click on Add Merchandise, you can choose merchandise items to transfer. You will be prompted for a quantity and bin (if applicable). Please contact Visum support for a discussion about "Bill To Store For Cost" before selecting this option.
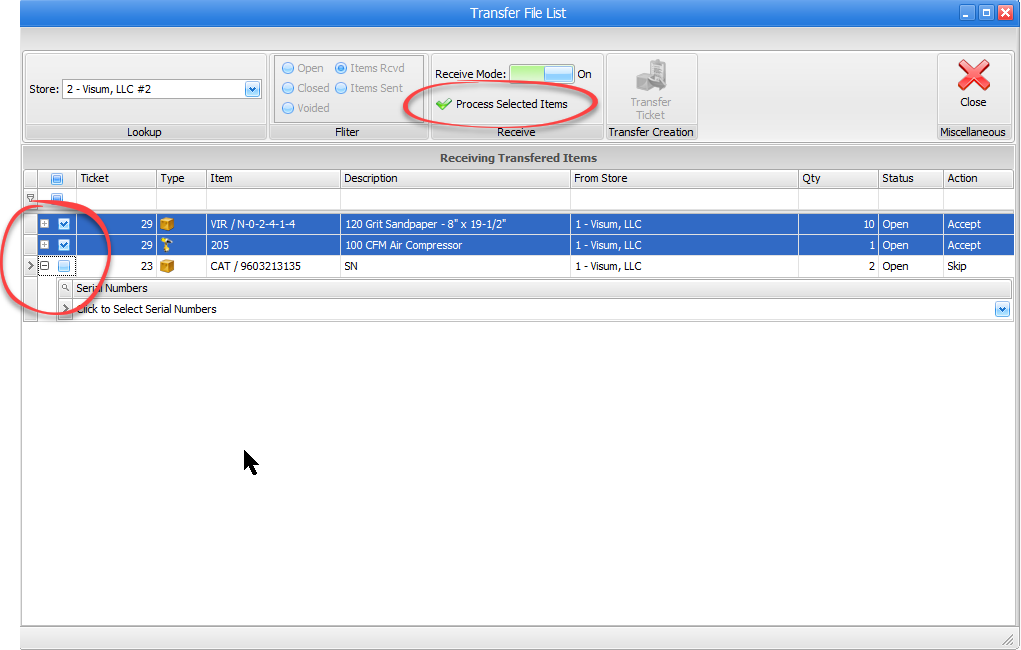
To Receive Items
Turn on "Receive Mode" and make sure your store is set to the correct store receiving the items. Check the box next to the items you are receiving. If you are receiving serialized items you will be prompted to select serial numbers. Click on "Process Selected Items" when you have selected all of the items you are receiving.