Synchronizing PO's with QuickBooks and Sage 50

Contents
Synchronizing PO's with QuickBooks or Sage 50 is different from exporting financial data. As opposed to the exporting process, the function to synchronize PO's with Quickbooks or Sage 50 maintains a one-to-one relationship between the two platforms.
For the remainder of this topic, anything referring to QuickBooks also refers to Sage 50.
Setup
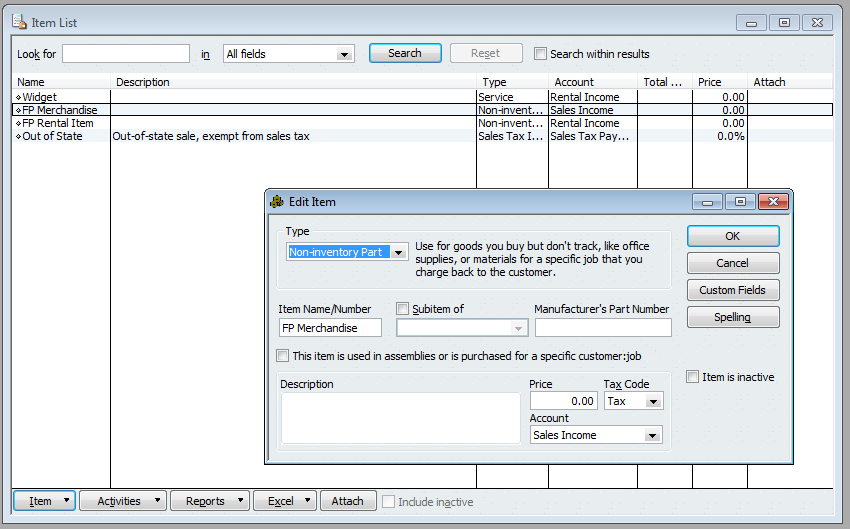
Set up 2 items in QuickBooks or Sage 50, one for rentals and one for sales, as shown below. Set them up as Non-Inventoried parts. The GL account that you assign to these parts is a formality, as the account that is actually used will be determined at the time the Purchase Order is exported from FocalPoint.
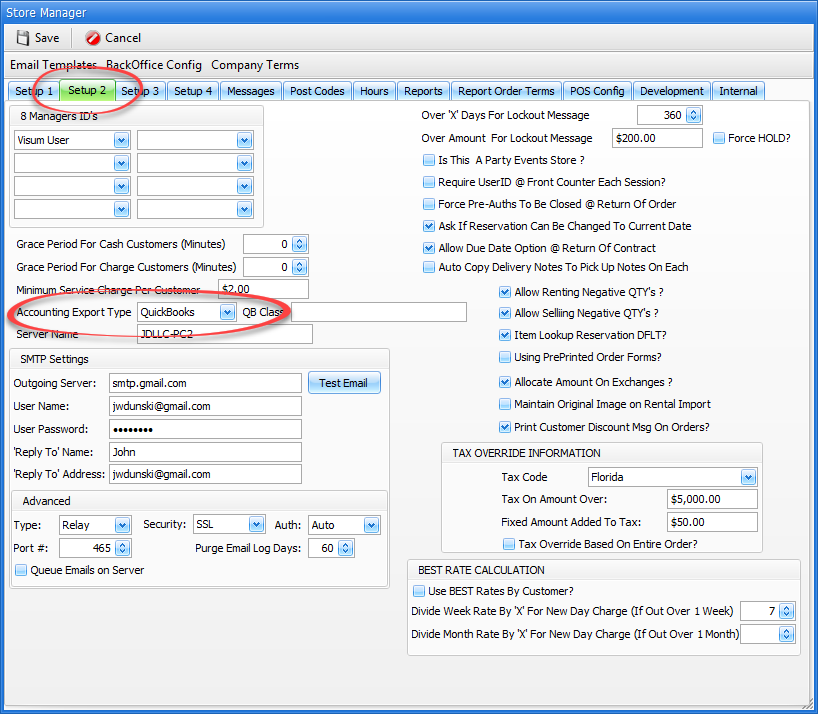
In FocalPoint, go to the store manager file, C-4 from the main menu. You will need to do this for each location. In the setup 2 tab, make sure that the Account Export Type is set to QuickBooks. Close out of the store manager file. If you are not using QuickBooks for your accounting integration, PO Synchronizing will not be available.
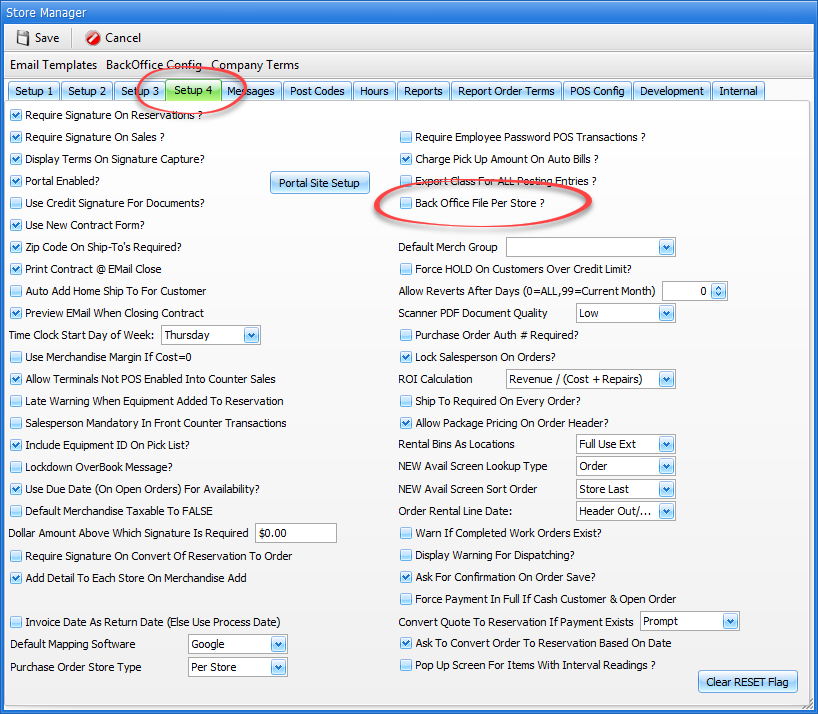
While in the store manager file, on the setup 4 tab, set these fields as needed, check/uncheck the Back Office File Per Store as needed. Check this box if you want to be able to export PO’s to multiple/separate QuickBooks companies based on the FocalPoint store.
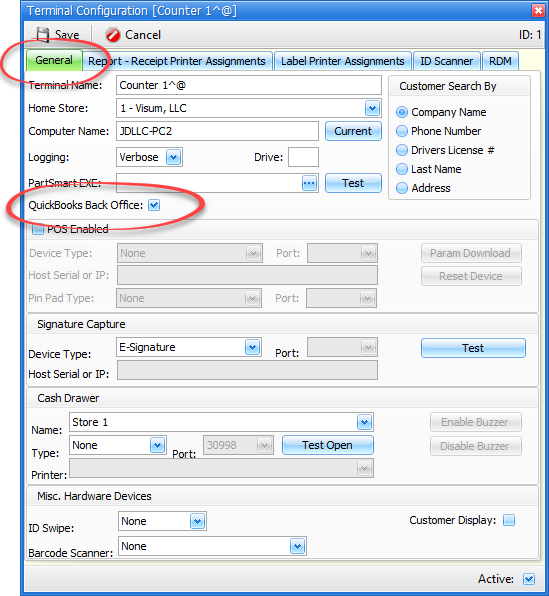
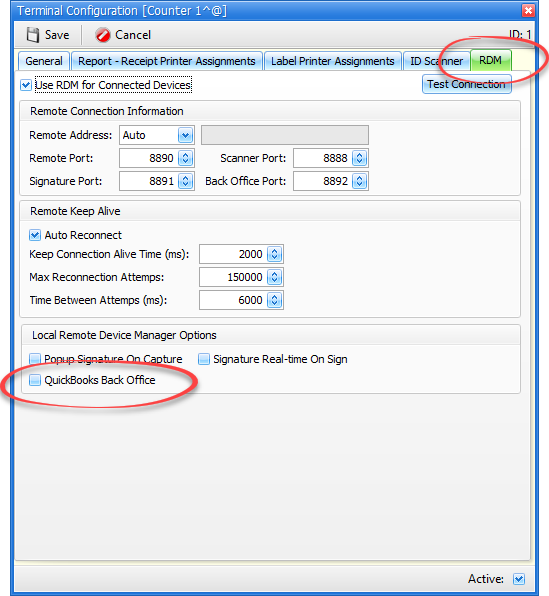
Go to the terminal file, C-3 from the main menu. Select the terminal(s) that you will be using for exporting. Check the box labeled QuickBooks Back Office. If using RPD to connect to the server, also go to the RDM tab and check the box labeled QuickBooks Back Office. If you are not sure if you need to enable the RDM field, please contact Visum Support.
Make sure that QuickBooks is open to the QuickBooks company you are configuring FocalPoint for. Go back to the store manager file (C-4) and click on the button BackOffice Configuration link on the top of the store manager screen.
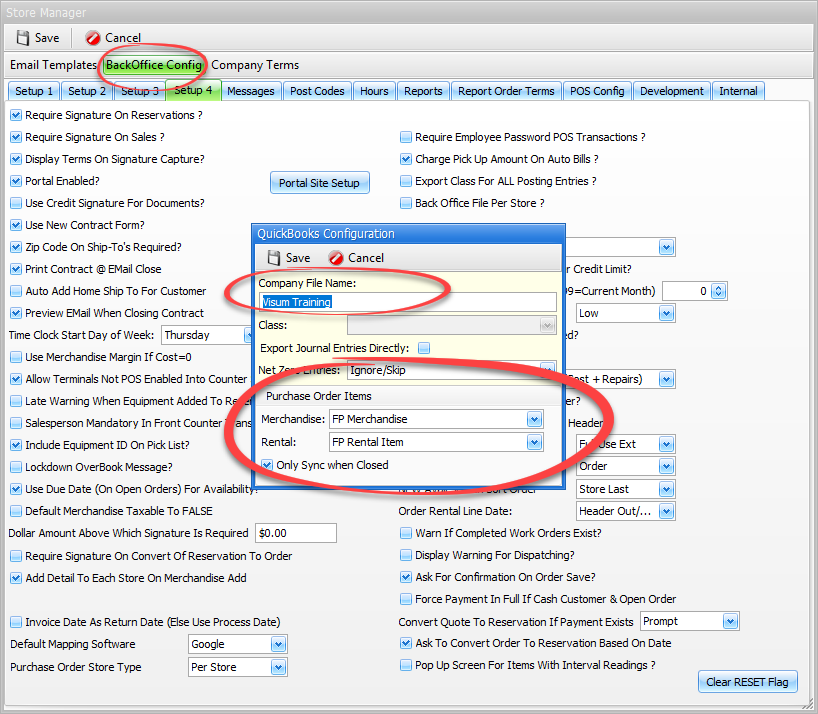
•The File Name will be automatically set for you based on the QuickBooks company you have open.
•The Class field will be available if you enabled the “Back Office File Per Store” checkbox on the Setup 2
•tab. Select the appropriate QuickBooks "Class” for this store as needed.
•Set the Merchandise and Rental Items in the Purchase Order Items fields based on how the items you set up in QuickBooks previously.
•It is recommended that the "Only Sync when Closed" checkbox is checked.
Synchronizing GL Accounts and Vendors
In order for FocalPoint to be able to communicate with QuickBooks, vendors and general ledger accounts need to be synchronized between the two platforms.
General Ledger Synchronizing
1.Go to #9 from the main menu.
2.Click on QuickBooks Link button.
3.For every account under the “Name” column (which is showing GL Accounts from QuickBooks), select a GL Account from on the “FocalPoint GL Account Action” Column.
4.After you've made your selections, click on Submit to QuickBooks
(hint - you don't need to synchronize any GL accounts that have nothing to do with anything you might purchase. If you choose to skip over some accounts now, you come back to this section later to fill in the gaps)
Vendor Synchronizing
1.Go to #7 from the main menu
2.Click on the QuickBooks Link button.
3.The "Name" column represents the vendors currently set up in FocalPoint. The "QuickBooks Vendor Action" column allows you to:
a.Ignore the FocalPoint Vendor
b.Auto Create a new vendor in Quickbooks
c.Select a QuickBooks Vendor to match to the FocalPoint Vendor
4.After you've made your selections, click on Submit to QuickBooks
(hint - In the future, as you add new vendors to FocalPoint, you will be prompted to also add vendors to QuickBooks)

Using the QuickBooks Purchase Order Sync function
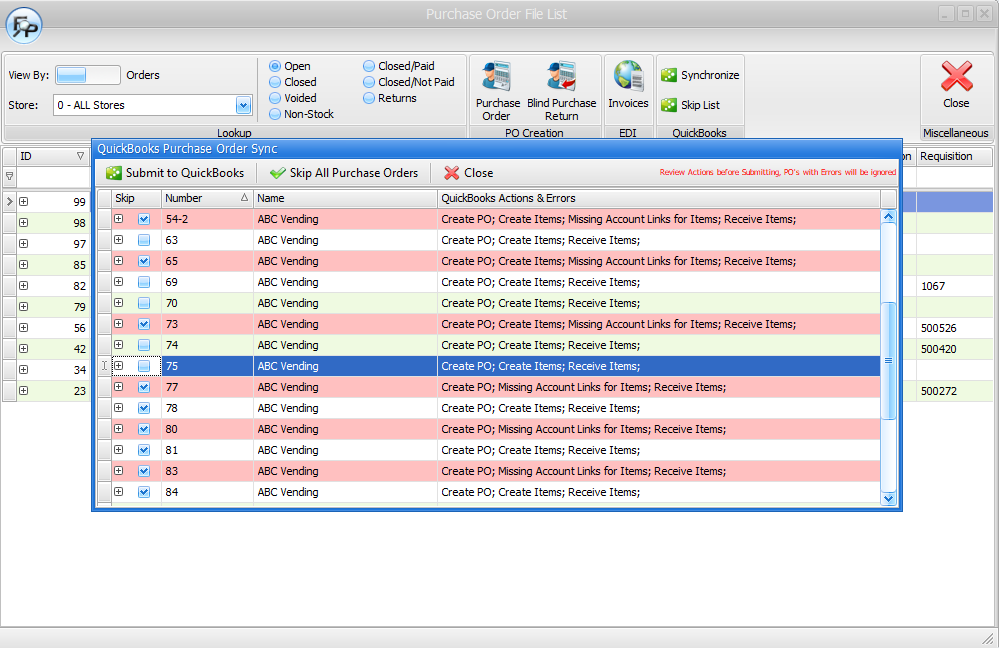
You will see two new buttons at the top of the Purchase Orders screen:

If you click on QuickBooks Sync, you will be presented with a list of PO’s and actions that can be taken. Any “red” lines will not be submitted, and the “QuickBooks Actions and Errors” column will give an explanation as to why. Any “white” lines will be submitted, and again, the “QuickBooks Actions and Errors” column will give an explanation as to what specifically will happen.
You may also use the far-left “skip” column to skip over a PO. Use the QuickBooks Skip List at the bottom of the Purchase Order List screen to revisit these skipped PO’s as needed. To skip all PO's (for times when you've been using PO's for a while, but just started Synchronizing, and you want a fresh start), you may Skip All Purchase Orders, then Submit to QuickBooks (nothing will submit, because all have been skipped).
Once synchronized, Purchase Orders are created in your accounting software. Please refer to your accounting software documentation for processing purchase orders in that software.