Set up email

Contents
Objectives:
Successfully send a test email from the store manager file
Set up your E-Mail Templates so that the emails you send out of FocalPoint look professional
User File
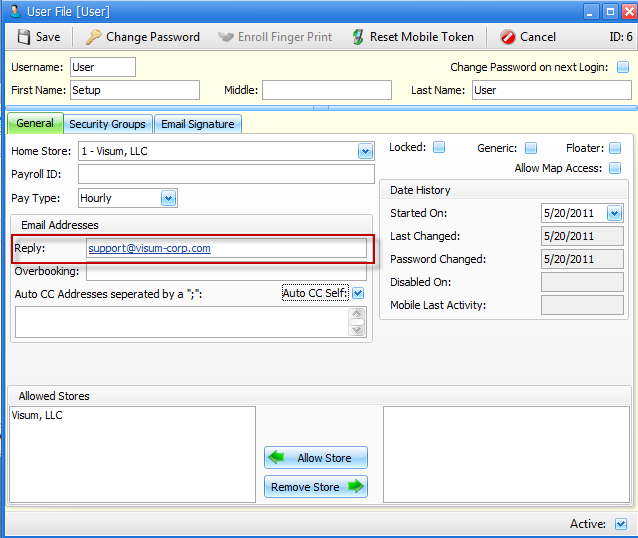
C-6 from the Main Menu. The existing “Reply To” in the store manager file is still valid, but if you’d rather have the “Reply To” for an email you are sending reflect the USER’s reply to address, enter the email address in the appropriate user file record.
Store Manager File Changes
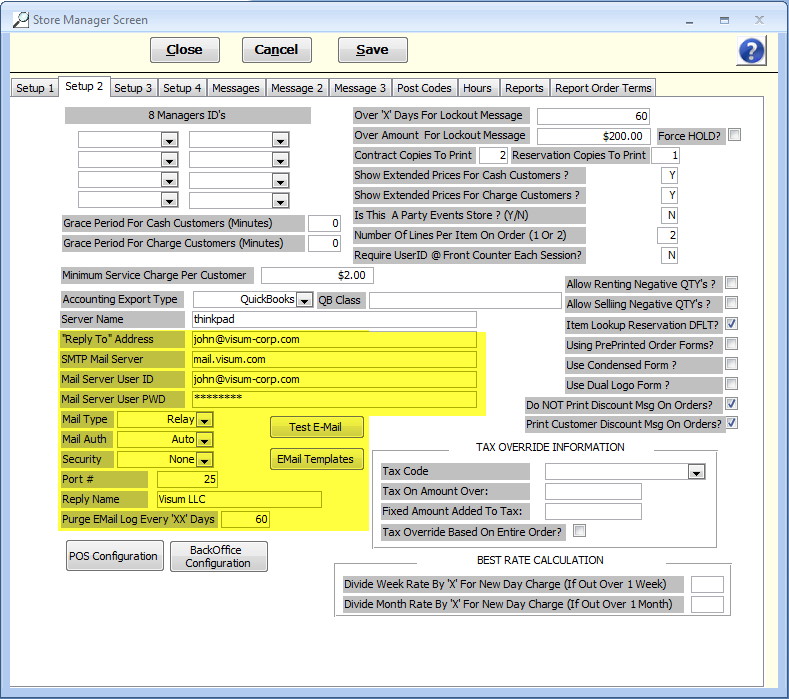
(C-4 from the Main Menu, setup 2 tab). New fields have been added to the store manager file to improve stability and consistency when sending emails. These fields shown in the above picture can be considered “normal” default settings and should work in most circumstances. Field definitions for these new fields are as follows:
Reply to Address
Enter the default reply to address for emails. If your user account also has a reply to address, the user account reply to address will prevail.
SMTP Mail Server
This setting is typically provided by your email service provider. Often times, if you use MS Outlook, the mail server will be specified in Outlook settings. ALternatively, if you use GMail or Yahoo or Hotmail, you can Google something like "SMTP Mail Server GMail" to find the proper setting. Of course, you may always call Visum support if you cannot find the proper setting.
Mail Server User ID and Password
Fill these fields in with the ID and Password you would normally use to log in to your email account.
Mail Type
Relay: Sends message through a smarthost (The way you used to doing it).
Direct: Looks up the email server of the recipient and sends it direct to their server
Mail Auth
Sets the Authentication used when logging into the SMTP Server
Security
Sets the security communication used between FocalPoint and the SMTP Server
Port #
Port number the relay server uses to receive SMTP traffic e.g. 25
Reply Name
When this is set the receiver sees the senders email as ‘ReplyName’ <ReplyAddress> instead of just the email address.
Once you've entered all of these settings, click on the "Test Email" button, and check your email (in the reply to address) to see if you've received a "Test EMail" from FocalPoint. This test email may be in your Junk Email folder.
Email Templates
Email templates may also be accessed from the store manager file (see picture in “Store Manager File Changes” section. When you click on the email templates button in the store manager file, a screen will appear as shown above. From here you can create “email templates” for various documents that you can email from FocalPoint.
Templates are “dummied” in this file when version 2.43 is installed. This is one area that should be modified to fit your needs at your earliest convenience (otherwise, the default body of the email will make no sense). Also note that you can use “merge fields” in your email templates. Merge fields are relevant fields that are available to be included in your default email (like order number, PO number of the order, etc).
These are only templates. When you choose to email a document from FocalPoint, the message in the email will look like the template. You are free to change the subject and body of an individual email prior to sending. These templates are here to streamline the emailing process and cut down on typing.
Email Dialog Screen
When you choose to e-mail individual document from FocalPoint, you will now be presented with the above screen. You may send emails from FocalPoint at many different screens. Look for the "Send Email" button. Once you click on this button, the above screen is populated using the following information:
From
This is either the reply-to address in the e-mail file or, if there isn’t one, the default reply-to address in the store manager file.
To
This is either the authorized user’s email address or, if there isn’t one, the customer’s email address. You may add additional email address to this field. Separate email addresses by semi-colons (;).
CC
This is not defaulted to anything, but can be filled in with whatever email addresses you need. If you are ever concerned as to whether or not your email was sent from FocalPoint, try putting your own email address in there and see if YOU get it.
Subject
This field is populated from the appropriate template but may be changed as needed.
Message Body
This field is populated from the appropriate template but may be changed as needed.
Features in the top bar
You may attach additional files to the email. There is also a “Message” tab where you have options to change font, color, size, etc.