Portal Setup
Before setting up and synchronizing your data with the Portal for the first time and are using the E-Catalog option we recommend you make sure your Groups and Rate Tables are cleaned up for public viewing as that is what drives the E-Catalog. All your Groups and Rate Tables should have a well defined description along with a Image as these will now be publicly viewable.
Registration
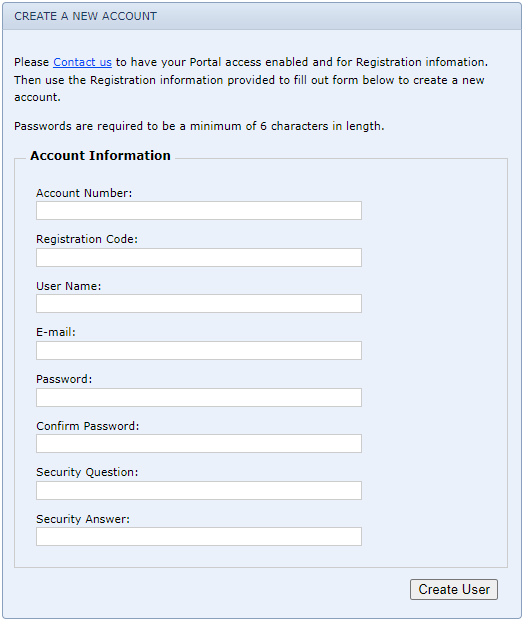
After you get the Portal you will receive a Registration Code from the Support Team. Using that code go to https://www.focalpointportal.com/cp/Customer/Register.aspx

•Account Number: Enter a 0
•Registration Code: The code you received from support
•User Name: Enter a user name you will remember, this will be you site admin account
•E-mail: The E-mail address you will associate with the admin account in case you forget your password
•Password: The password for the admin account, don't forget this as it will be needed to make changes to sites and to complete setup.
•Confirm Password: The same password as entered above
•Security Question: You own defined question to reset your password in case you forget
•Security Answer: The answer to the question above
When finished click Create User and then we will continue to FocalPoint to the Store Manager
![]() Store Manager - System > Portal Section
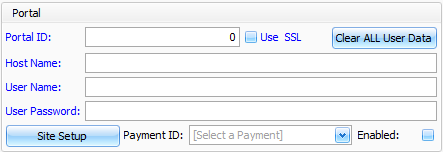
Store Manager - System > Portal Section
Portal ID: Provided by Visum Support Use SSL: Use SSL over HTTPS connections Host Name: If using a Custom Domain enter it here after Visum Support has enabled it otherwise enter www.focalpointportal.com User Name: This is the User Name you created for the admin during registration User Password: The Password for the user entered above Payment ID: If you have the optional module for E-Pay either create you select a Payment ID for payments received throw the Portal Enabled: If you want the Portal enabled [Site Setup] - After the above is entered or changed you need to send your settings to the portal, this will finish setting up or adjust your portal settings like the Store name and timezones [Clear ALL User Data] - This will clear all customers user data from the Portal and set everything to be resynchronized
|
|---|
After this is completed go back to the Portal and login as the admin you just created

