Images for Inventory

Contents
FocalPoint has the ability to save and display JPEG images or photos of your rental equipment and merchandise inventory. This document explains the two most common methods of getting your photos on the FocalPoint system. Whether you save images from the internet or load your own digital photographs, the place where they need to be stored on the FocalPoint server is the only real key.
Saving Images from the Internet
If you don’t have your own photographs taken of rental equipment, a lot of times using manufacturer photos from the manufacturer’s website works very well.
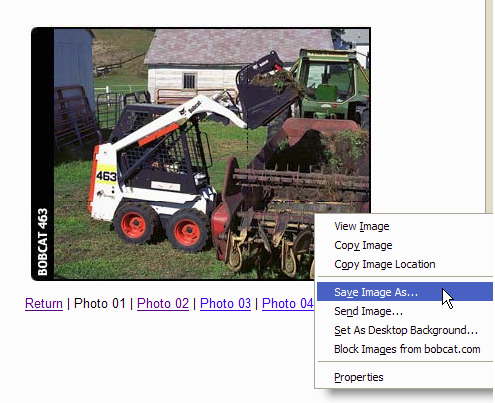
1.Open up your web browser and navigate to an equipment website that would show a picture you want to capture for your piece of equipment.
2.Find a photo you like, and right-click on that photo. Choose the option to “Save Image”. See the example below:
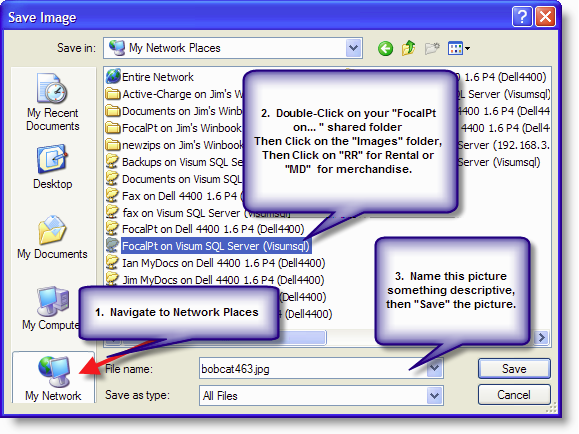
3.Navigate in the next window to find in your Network Places, the “FocalPt on… “ shared folder. It may look like “FocalPt on \\192.168.1.20” or something like that.
4.Next, Double-Click on “Images” folder
5.Rental images should be stored in the “RR” folder, Merchandise images in “MD”. Double-click on the folder you need.
6.Lastly, give the picture a descriptive name and save it in the RR or MD folder, depending on if this is Rental or Merchandise.
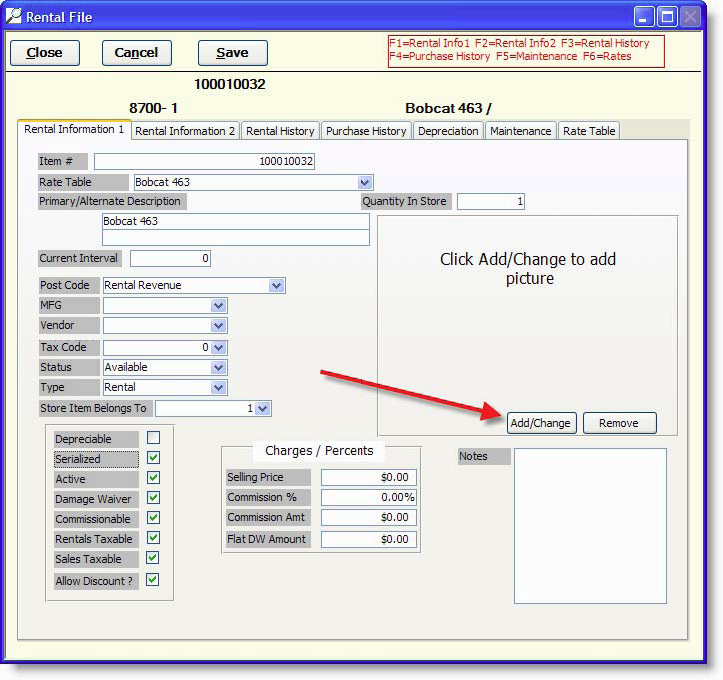
7.Now that the image is saved in the “RR” or “MD” folder on your server in the “FocalPoint\Images” area, you need to open the rental item you want this picture assigned to. For Rental, select 2-2 from the main menu, Merchandise 2-3 from the main menu. Our example will be for Rental.
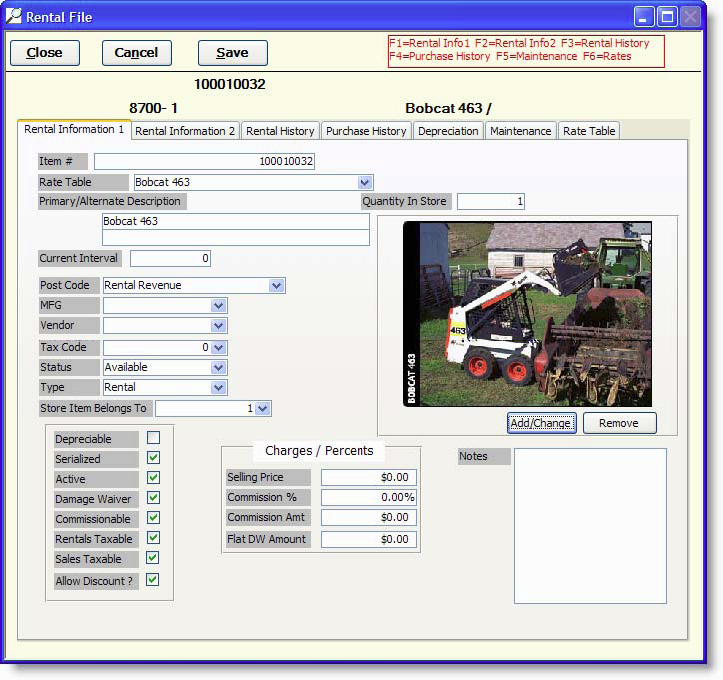
8.Once you have the Rental master record open, click on the “Add/Change” button as shown. Saving Rental / Merchandise Images in FocalPoint
9.You’ll see the window asking to select the photo you want to assign to this rental item. It should automatically take you to the shared “FocalPt on …” \Images\RR\ folder where you’ll see your photo you originally saved. See the example:
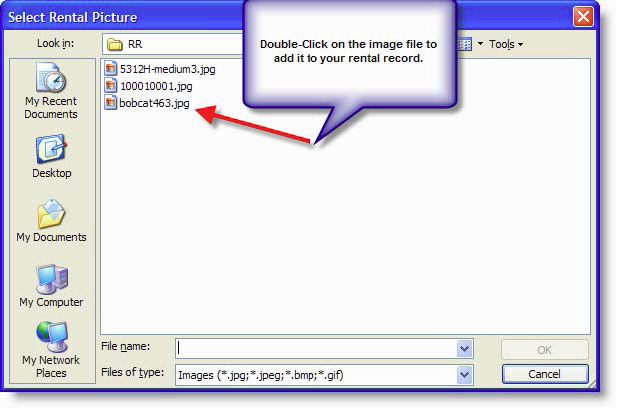
10.Once you double-click on the image you selected, you’ll see it in the Rental Item’s record, where you can click “Save” and then “Close” to finish.
Using your own Digital Photos
The only difference from the procedure described above, in using your own digital photos, you just need to transfer your digital photos to the “RR” folder (or “MD” for merchandise) on the server, in the shared “FocalPt on …” folder as discussed above. Once your digital images are there, the process is the same to open the rental or merchandise item and “Add/Change” the photo button and select the photo you wish to use.