Closing Transactions

Contents
1-3 from the Main Menu
Use the edit existing function to close an order, returning rental items and finalizing the sale of merchandise items. You can start a return in one of two ways. From the Edit Existing list screen, you can right click on an order, then click on "Return".
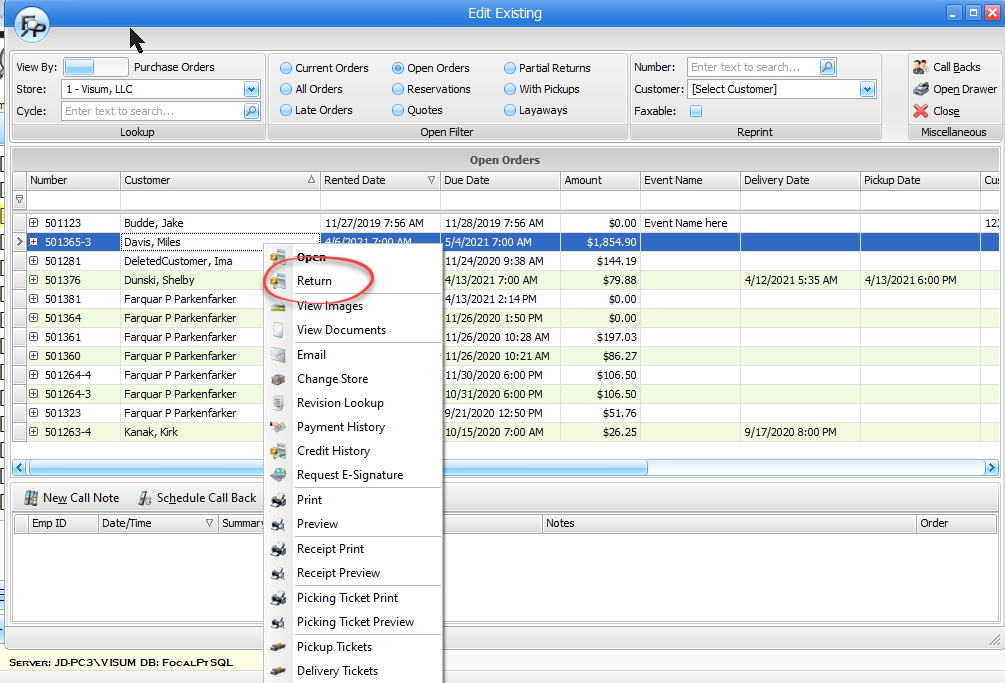
Alternatively, you can start the return process from inside the order:

Either method renders the same results.
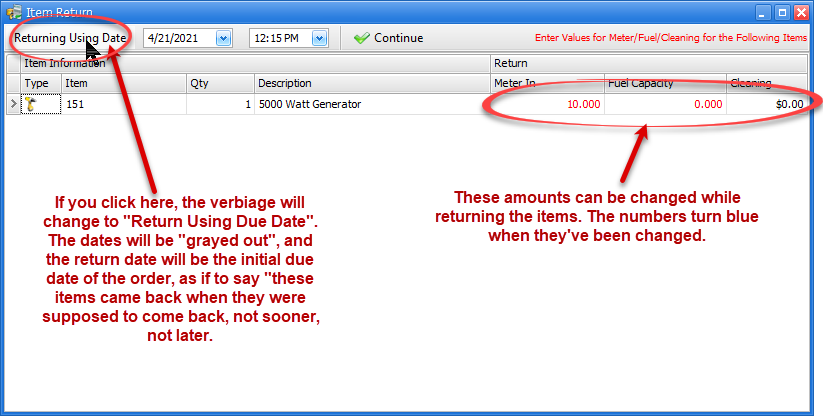
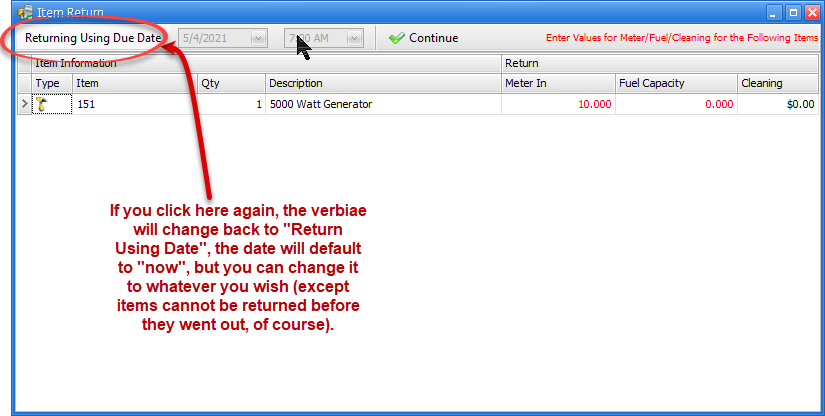
If you are returning items that have a default cleaning charge, fuel considerations, or an hour meter (as set up in the rate table), an Item Return screen will be shown, giving you the ability to change meters, charge for fuel, or assess cleaning charges. If you have set up FocalPoint to allow for it, you can also click on "Return Using Date" to toggle the date to be the due date. When the date verbiage shows "Return Using Date", the date will default to "now", but you can change it to whatever you wish (except items cannot be returned before they went out, of course). If you click on this verbiage, it will change to "Return Using Due Date". The dates will be "grayed out", and the return date will be the initial due date of the order, as if to say "these items came back when they were supposed to come back, not sooner, not later.
(Only the "Return Lines" and "Return Totals" tab will be covered in this help file. All other tabs have been covered in previous help files.)
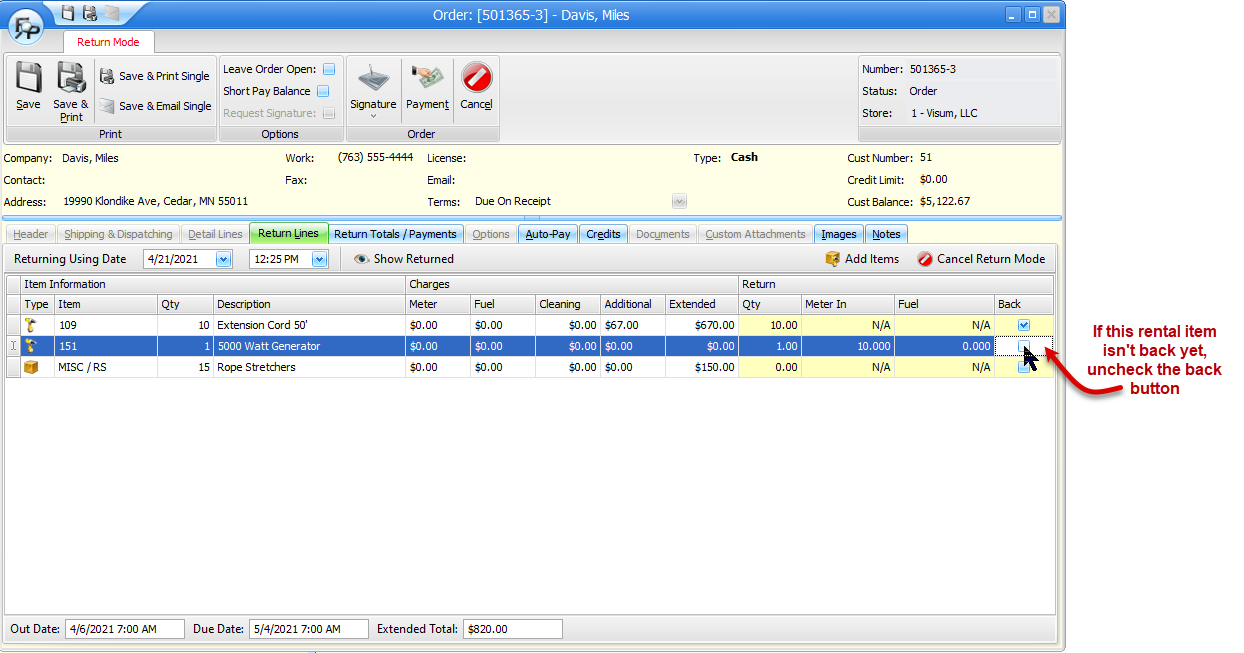
The Return Lines tab
Once you are done with the meter/fuel/cleaning considerations, you will see the items on the order in the "Return Lines" tab. All rental items will be presumed returned, and all merchandise items will be presumed sold. If this is what really happened, then you can proceed to the Return Totals/Payments tab.
Often times, however, things don't go as planned. Rental items don't always come back, or back in one piece. Merchandise items sometimes get returned, like when your customer took 10 sheets of sandpaper with him, but brought back 4. If all of the rental items didn't get returned, or if some or all of the merchandise items did get returned, you will need to address these variances before closing the order. Here's how:
If a serialized item is still on rent, or if the entire quantity of bulk item on one line of the order remains on rent:
1.Uncheck the "Back" checkbox (because it's not back).
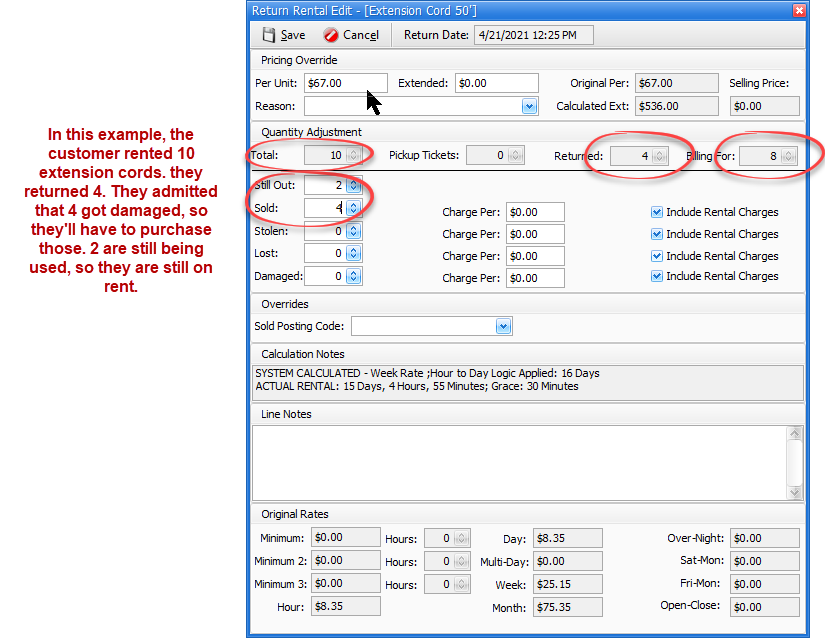
If a partial quantity of a bulk item on one line of the order did not come back:
1.Double click on the line
2.In the "Still Out" field, indicate how many are still on rent. You will see the "Billing For" quantity change.
3.If some of the items did not come back, and they're never going to come back because they are sold/stolen/lost/damaged, enter the number that are not ever going to come back. FocalPoint will sell these items to the customer on a separate line on the order. You can also use the "Charge Per" field to indicate how much to sell the items for, and check/uncheck the "Include Rental Charges" option. An example of how to use the include rental charges option is as follows:
a.If a customer rented 100 chairs from you, but 2 were damaged, and you wanted to charge rental on all 100 chairs, you would make sure the "Include Rental Charges" checkbox was checked when you were selling them the 2 chairs they bought.
b.If a customer rented 100 chairs from you, but 2 were damaged, and you wanted to charge rental on only the 98 chairs, you would make sure the "Include Rental Charges" checkbox was UN-checked when you were selling them the 2 chairs they bought.
(worth noting - The sold/stolen/lost/damaged options all do the same thing. They allow you to sell the items to the customer because they were sold, stolen, lost, or damaged. It's just how you want to convey it to the customer)
If the entire quantity of a merchandise item on one line has been returned:
1.Check the back button (because they're all back)
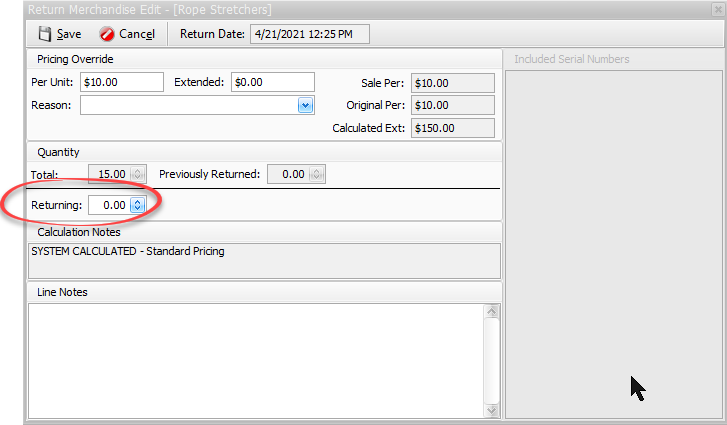
If a partial quantity of a merchandise item on one line of the order was returned:
1.Double click on the merchandise line.
2.Change the "Returning" field to the quantity being returned.
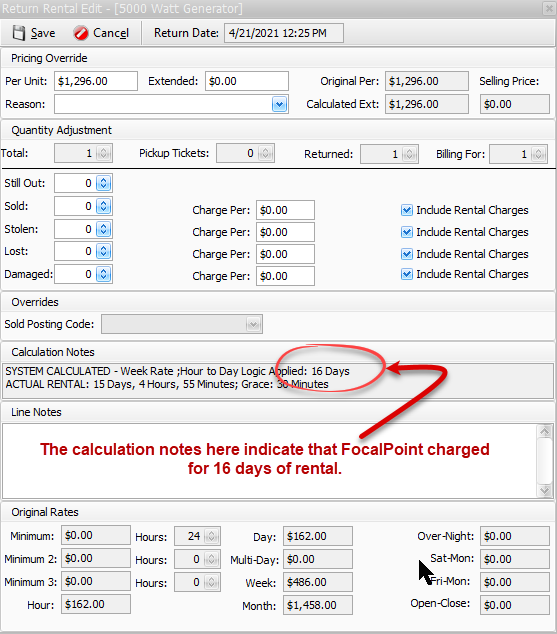
Other fun stuff you can do when you double click on a detail line during the return process:
•Change the price
•Add notes
•View the very important "Calculation Notes" that outline in detail how FocalPoint came up with the price it came up with.
•Choose reasons why changes were made.
The Return Totals/Payments tab
There is little on this screen that has not been covered during the previous help files. There are a couple of things worth noting, however.
You cannot preview the order during the return process. If we allowed this, it could promote theft:
1.Customer returns items, pays with cash.
2.Counter person processes return, takes payment, previews order, prints the order, gives the customer her "receipt"
3.The customer leaves, yet the order is still on the screen.
4.Counter person voids the payment and the order.
5.All of this is tracked in FocalPoint, but only if you run both the voided order and voided payment report on a regular basis.
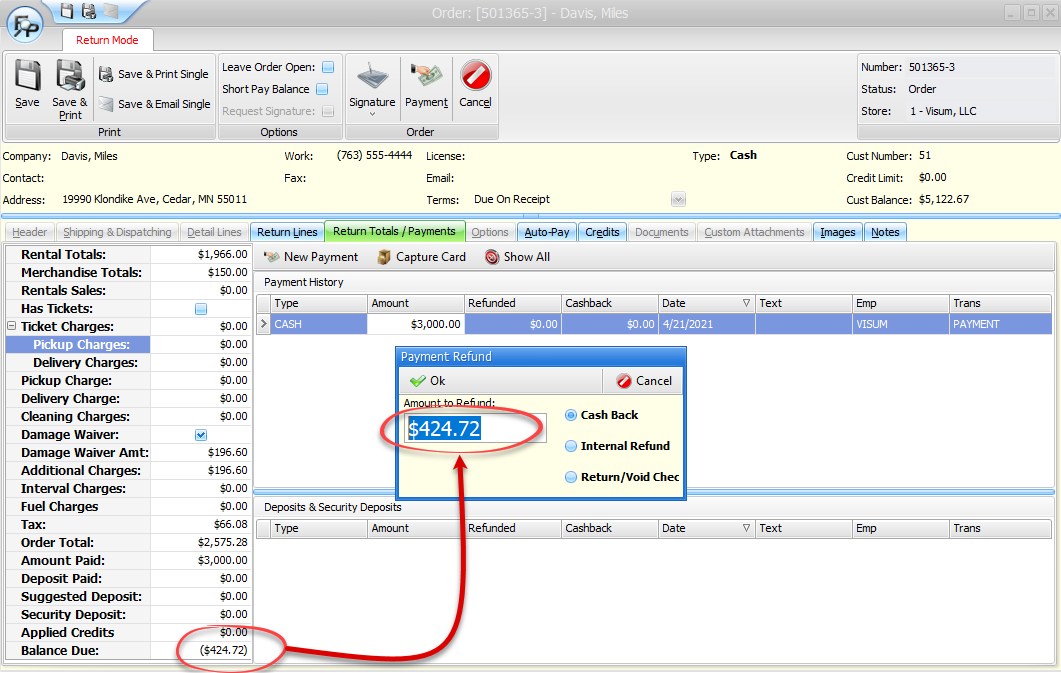
RIGHT CLICK ON A PAYMENT TO REFUND
If a customer has overpaid you, simply right click on one of the existing payments, left click on "refund", then (nine times out of ten) click on OK. There's no need to try to process a negative payment. Simply right-click-refund!